One-time setup of your Toniebox is the first step to hours of fun! Mytonies app or my.tonies.com/setup There are two ways to set up your Toniebox using . You will need a 2.4GHz WiFi connection, your Toniebox, and the Toniebox Charging Station to complete the setup. (Compatible with UK Sockets. You may need to use a UK plug converter) Let's get started!
If you have any problems with the installation, do not worry, we will be here for you and we would like you to know that we will be very happy to explain your general usage by doing your installation with our computer connection free of charge :) To reach us: https://www.dinossi.com/contact-us/ You can visit our address.
If you'd prefer to watch a video tutorial, check out our Toniebox installation video below:
If you prefer step by step instructions, check out the following:
Setting up your Toniebox via the mytonies app:
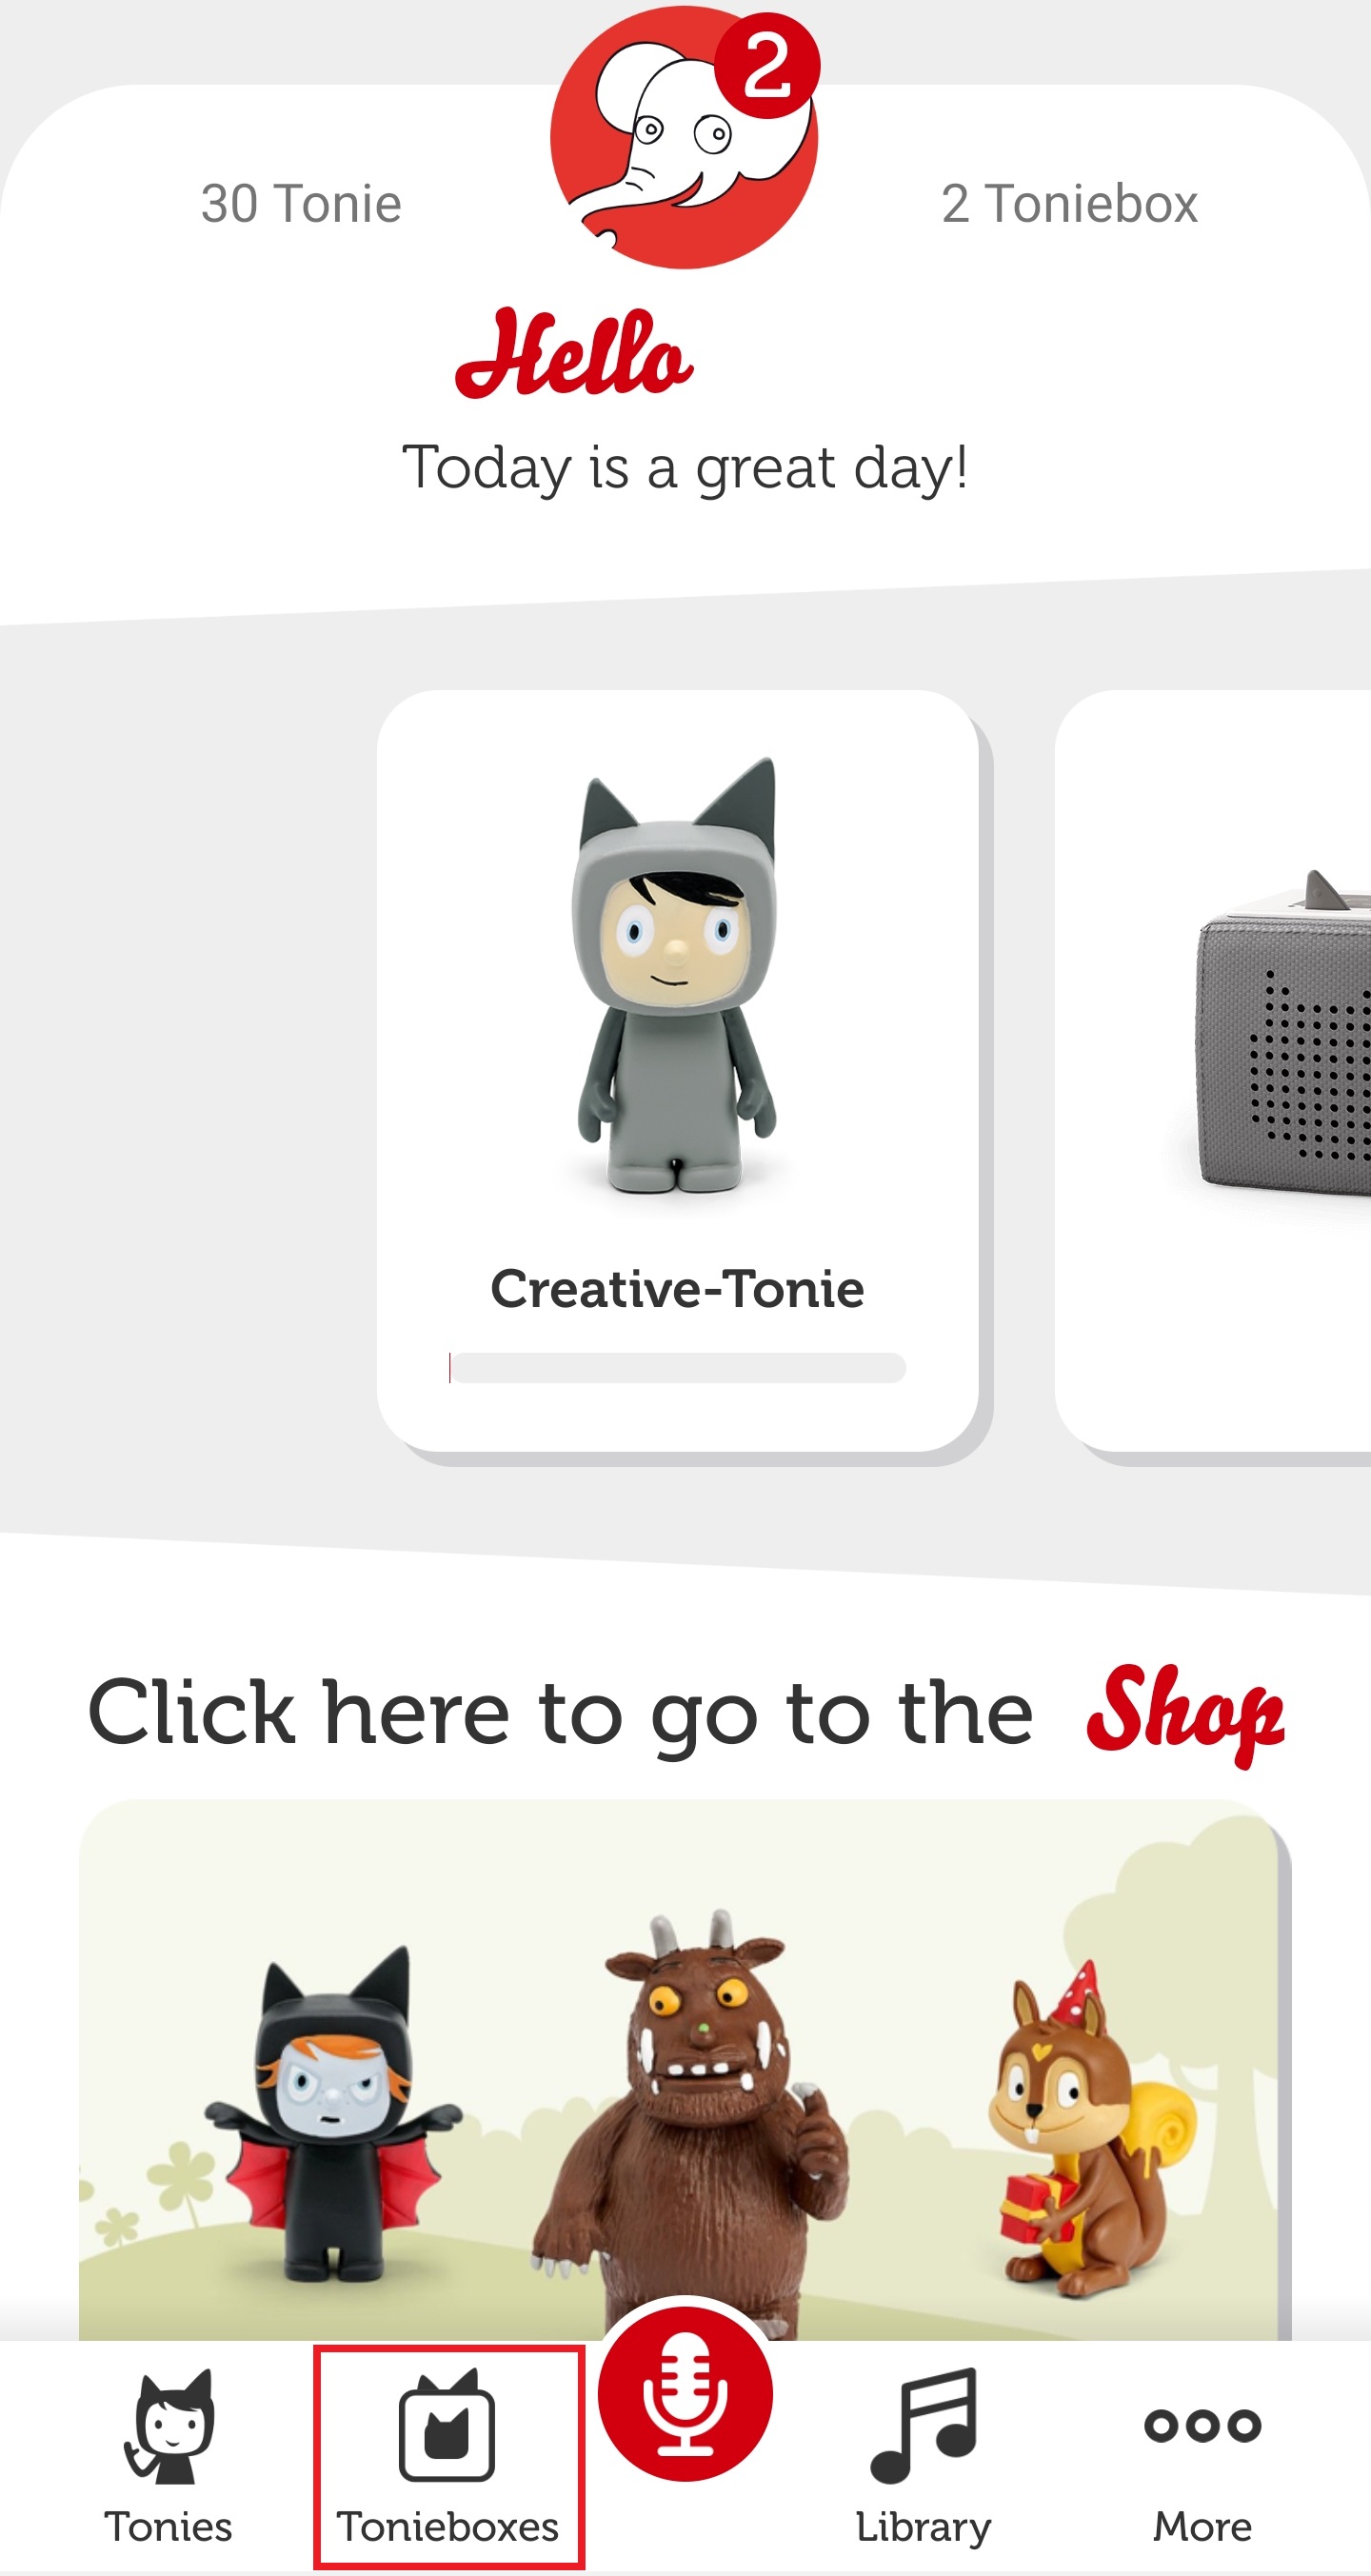
- Download the mytonies app from the App Store (iPhone) or Google Play Store (Android). Open the Mytonies app and log in or create your free Tonie-Account if you haven't already. Once logged in, tap the 'Tonieboxes' tab at the bottom of the screen.
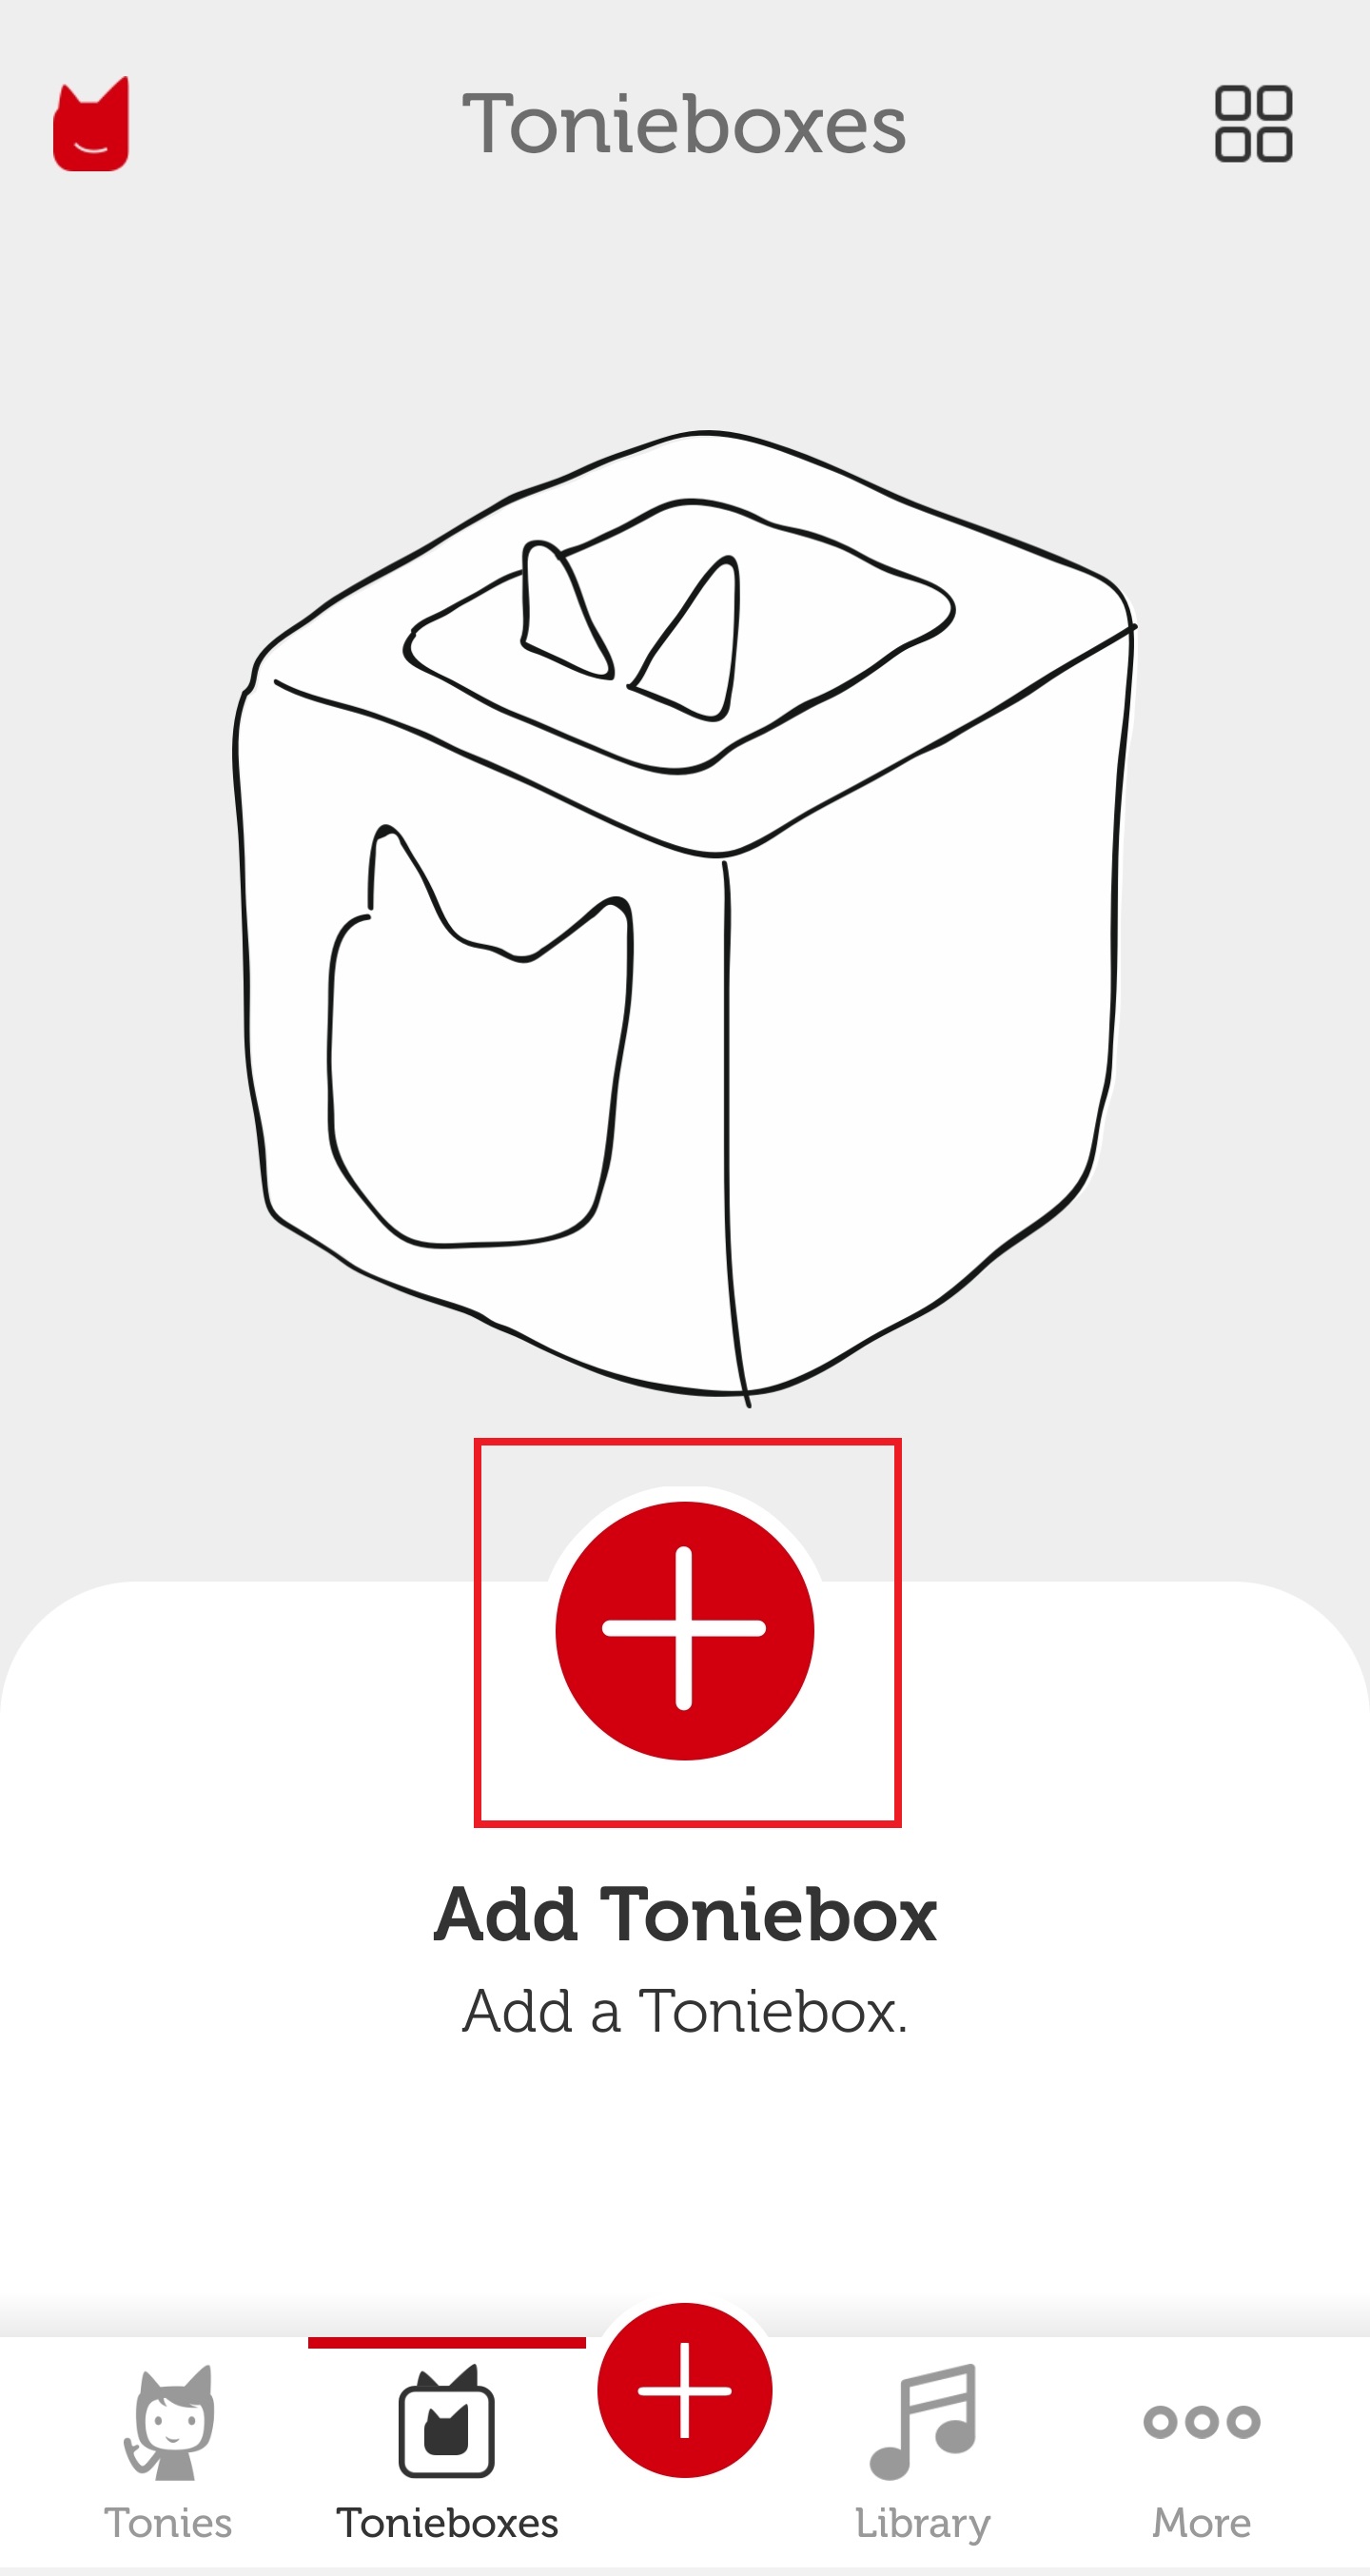
- Tap the red plus sign to add Toniebox and start the installation process.
- Make sure you have access to a 2.4GHz WiFi connection, your Toniebox, and the Toniebox Charging Station. When you're ready, tap 'Start Now'.

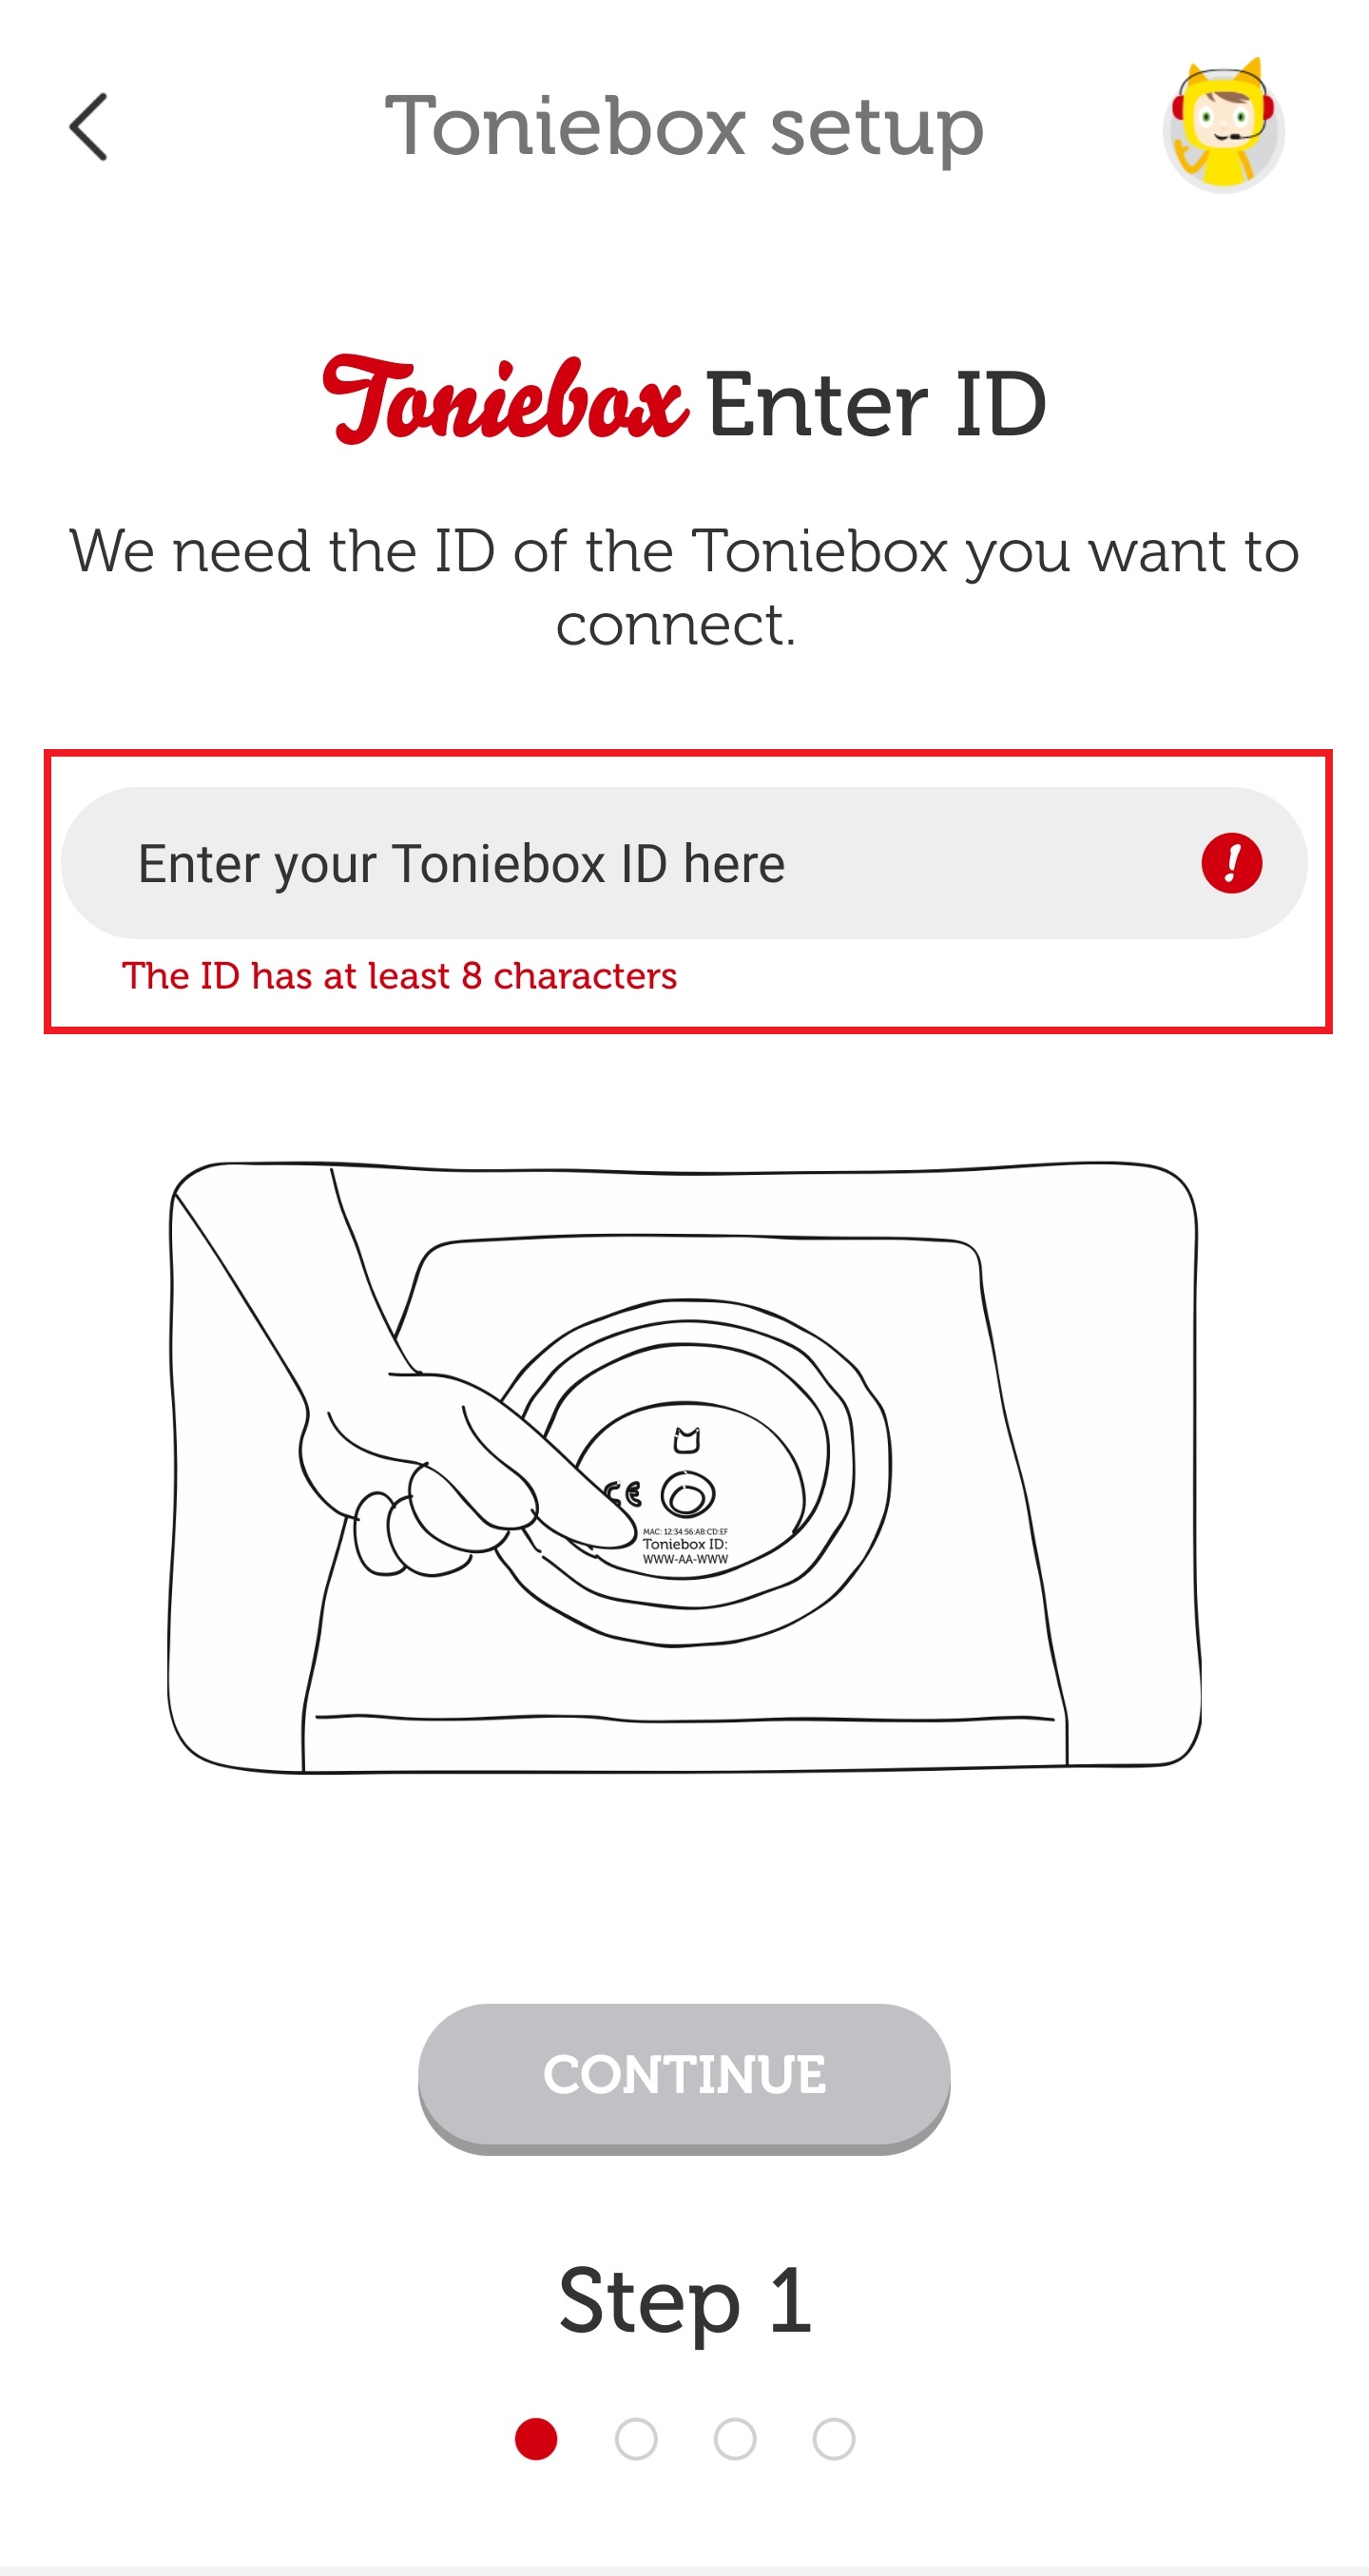
- Enter your Toniebox ID. This is the 8-digit ID that can be found on the bottom of your Toniebox. Make sure the Toniebox is not on the charger, otherwise you won't be able to see the Toniebox ID. Once you've entered your Toniebox ID, tap 'Continue'.
- Place the Toniebox on the charger to turn it on. Then, pinch both ears for about 5 seconds until you hear a beep and the LED starts flashing blue. Wait approximately 20 seconds until you hear a second beep. Then tap 'Continue'.

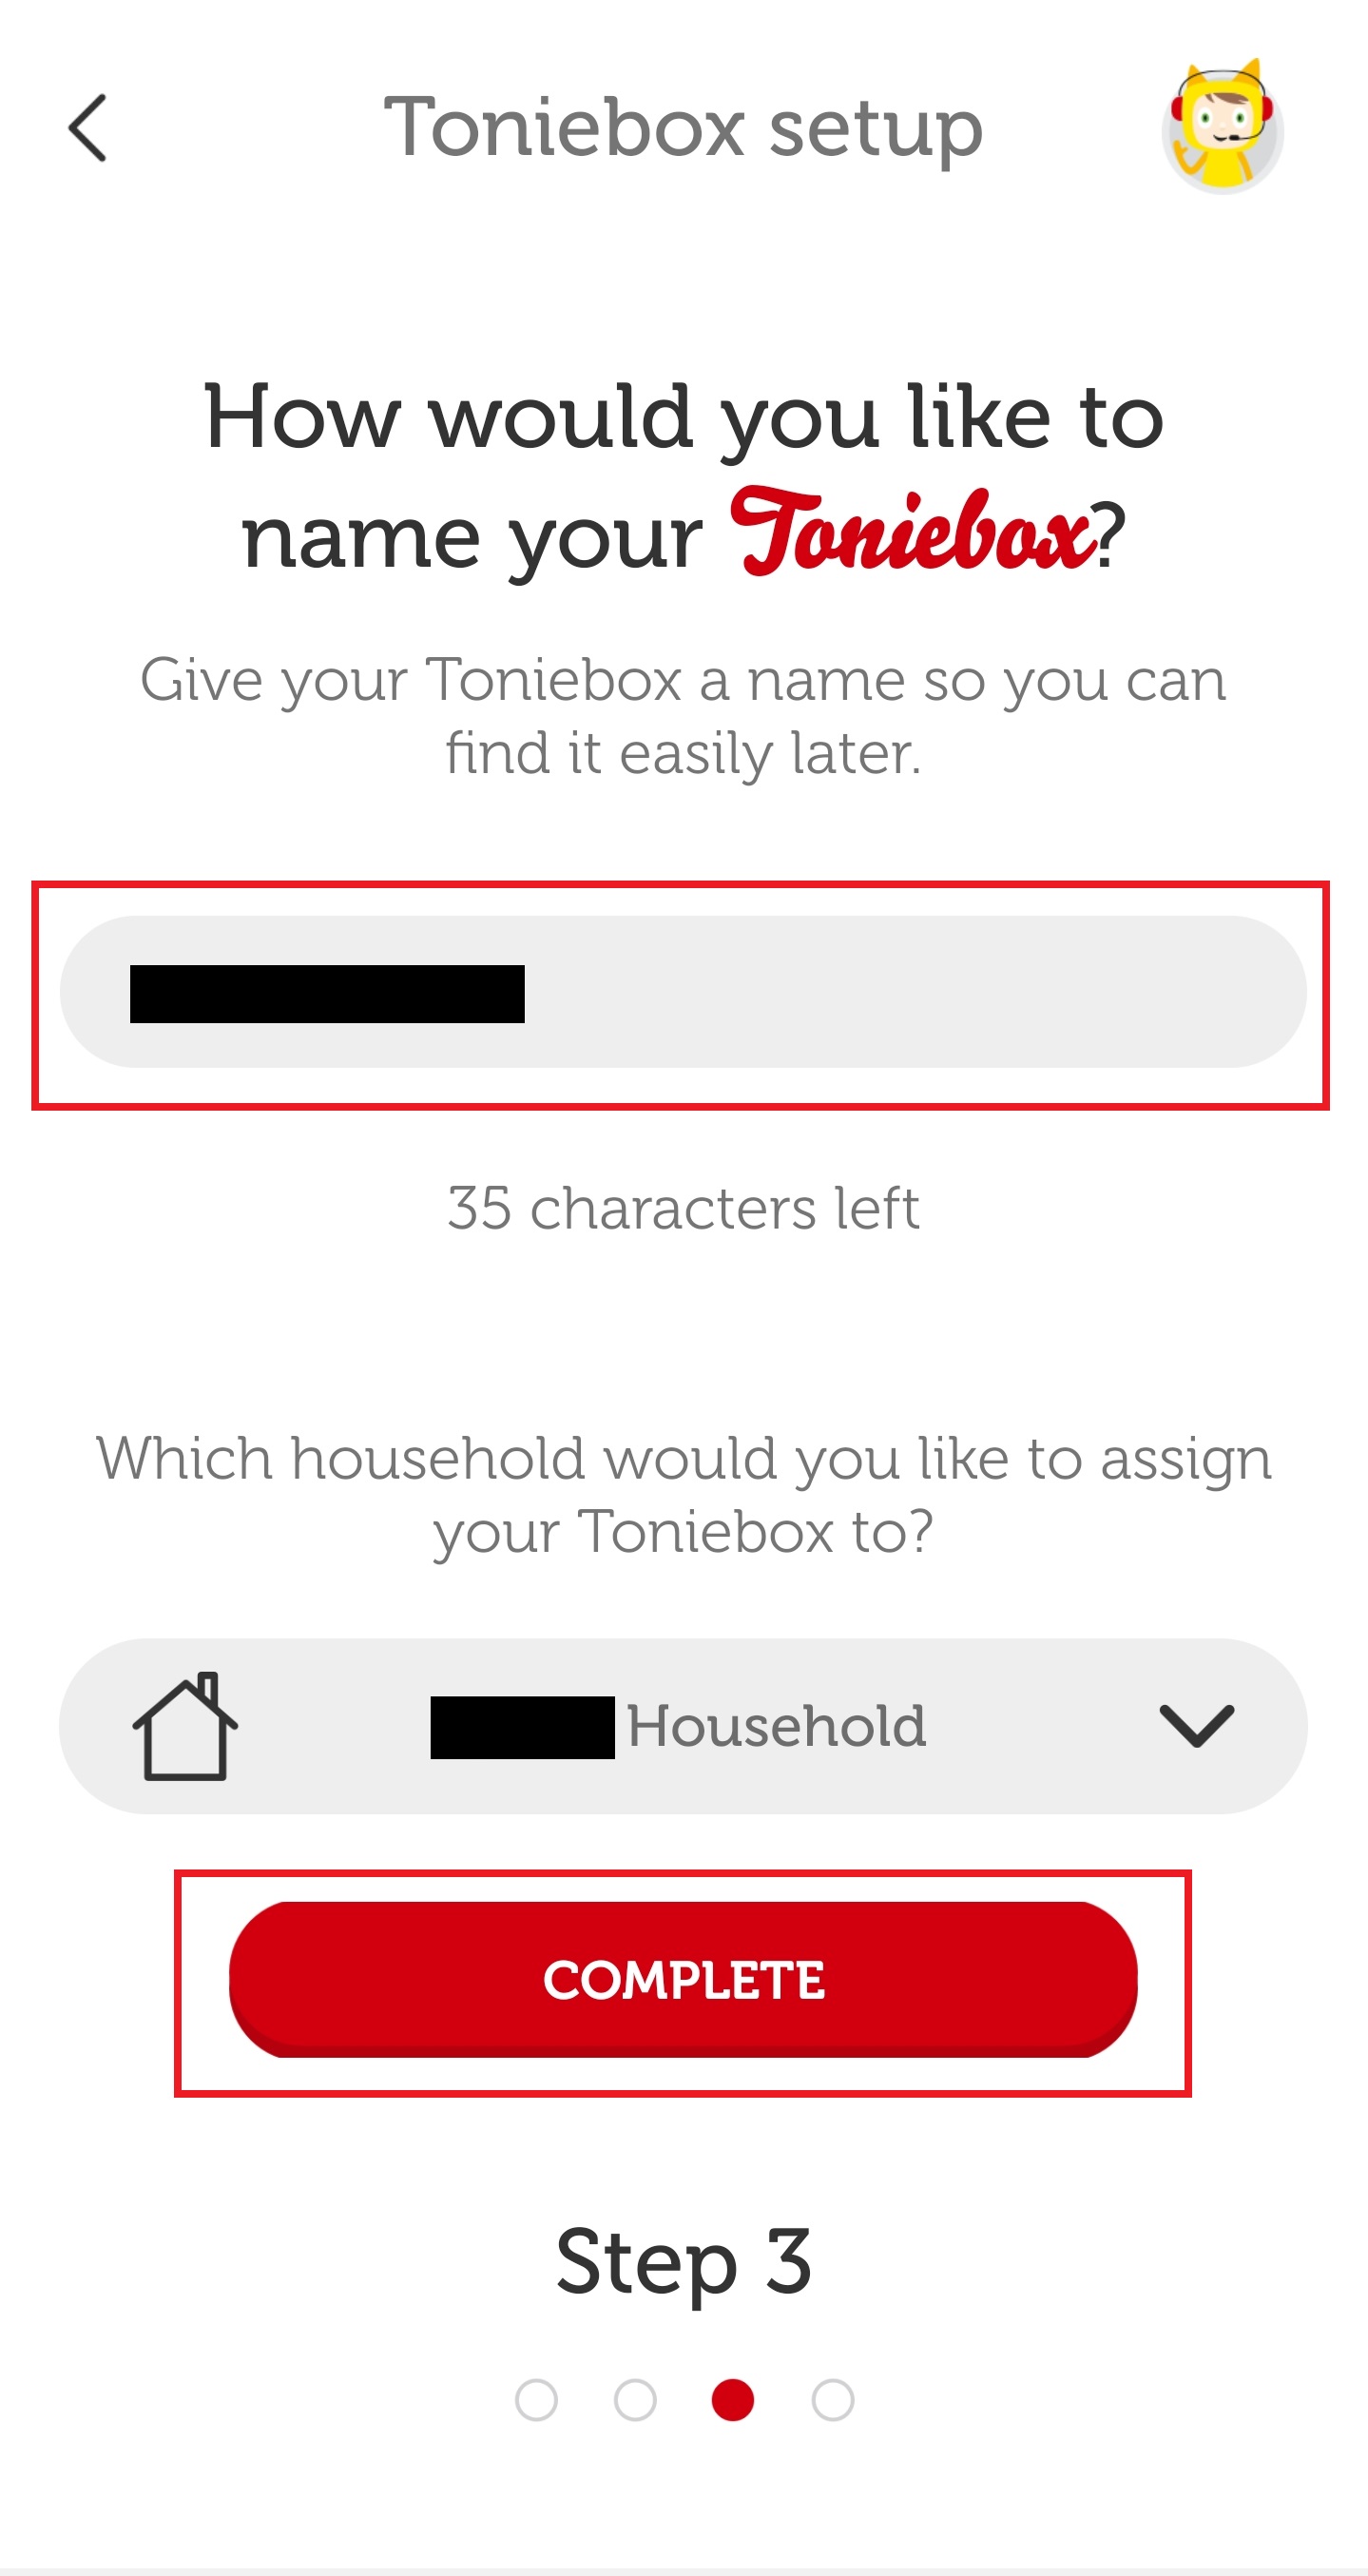
- Here you can name your Toniebox. After entering a name, tap 'Complete'.
- You will now be connected to your 2.4GHz WiFi. This process will vary slightly depending on the smartphone you use, iPhone or Android.
iPhone
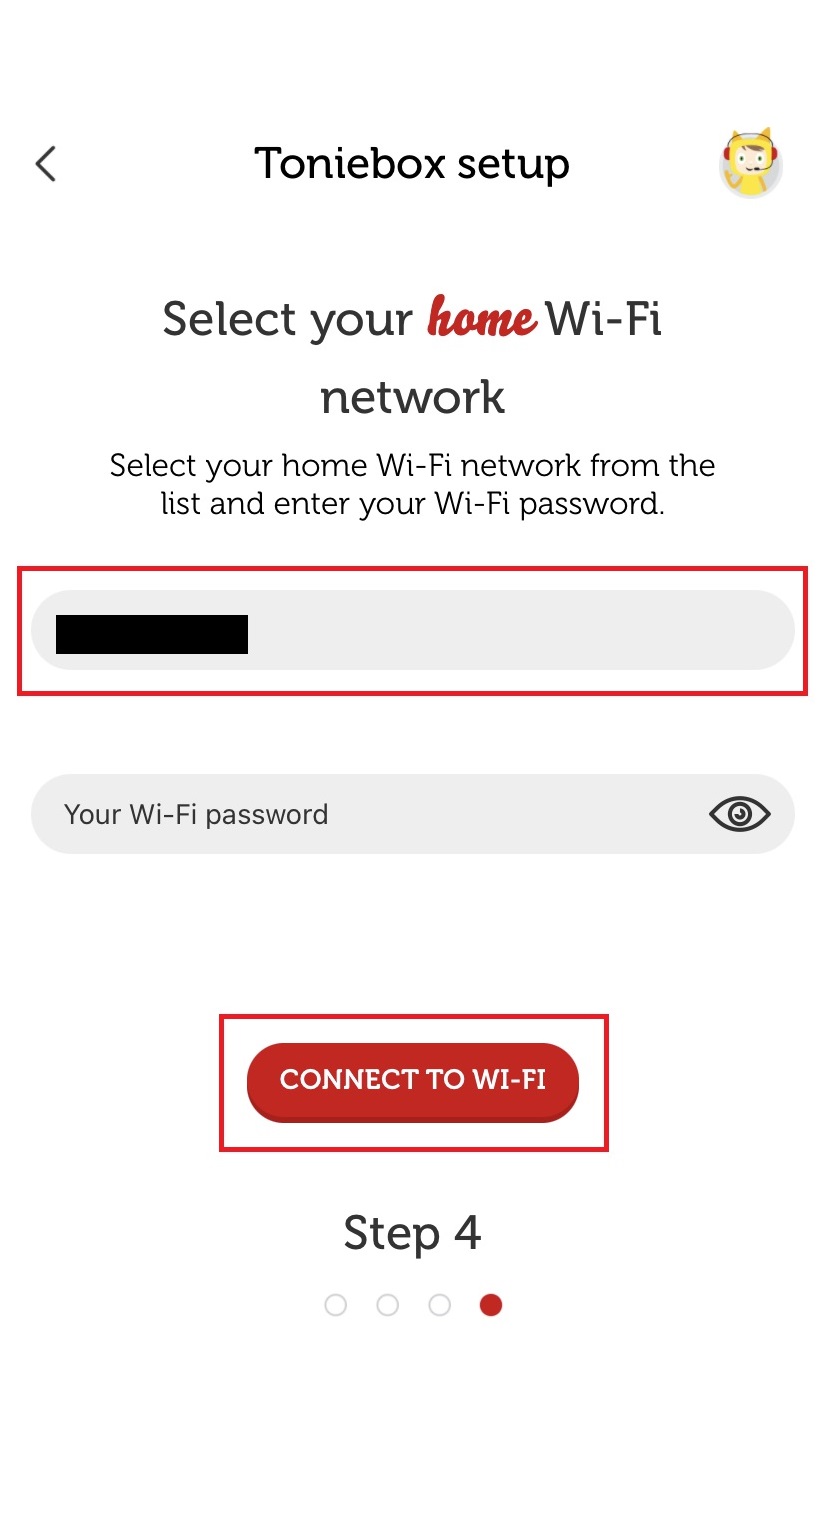
The WiFi your iPhone is currently connected to will be pre-populated in the WiFi name section. If this is the correct 2.4GHz WiFi you want the Toniebox to connect to, enter the correct password and tap 'Connect to WiFi'. If you want to connect to a different WiFi, you can manually type the name before entering the password and tapping 'Connect to WiFi'.
Android
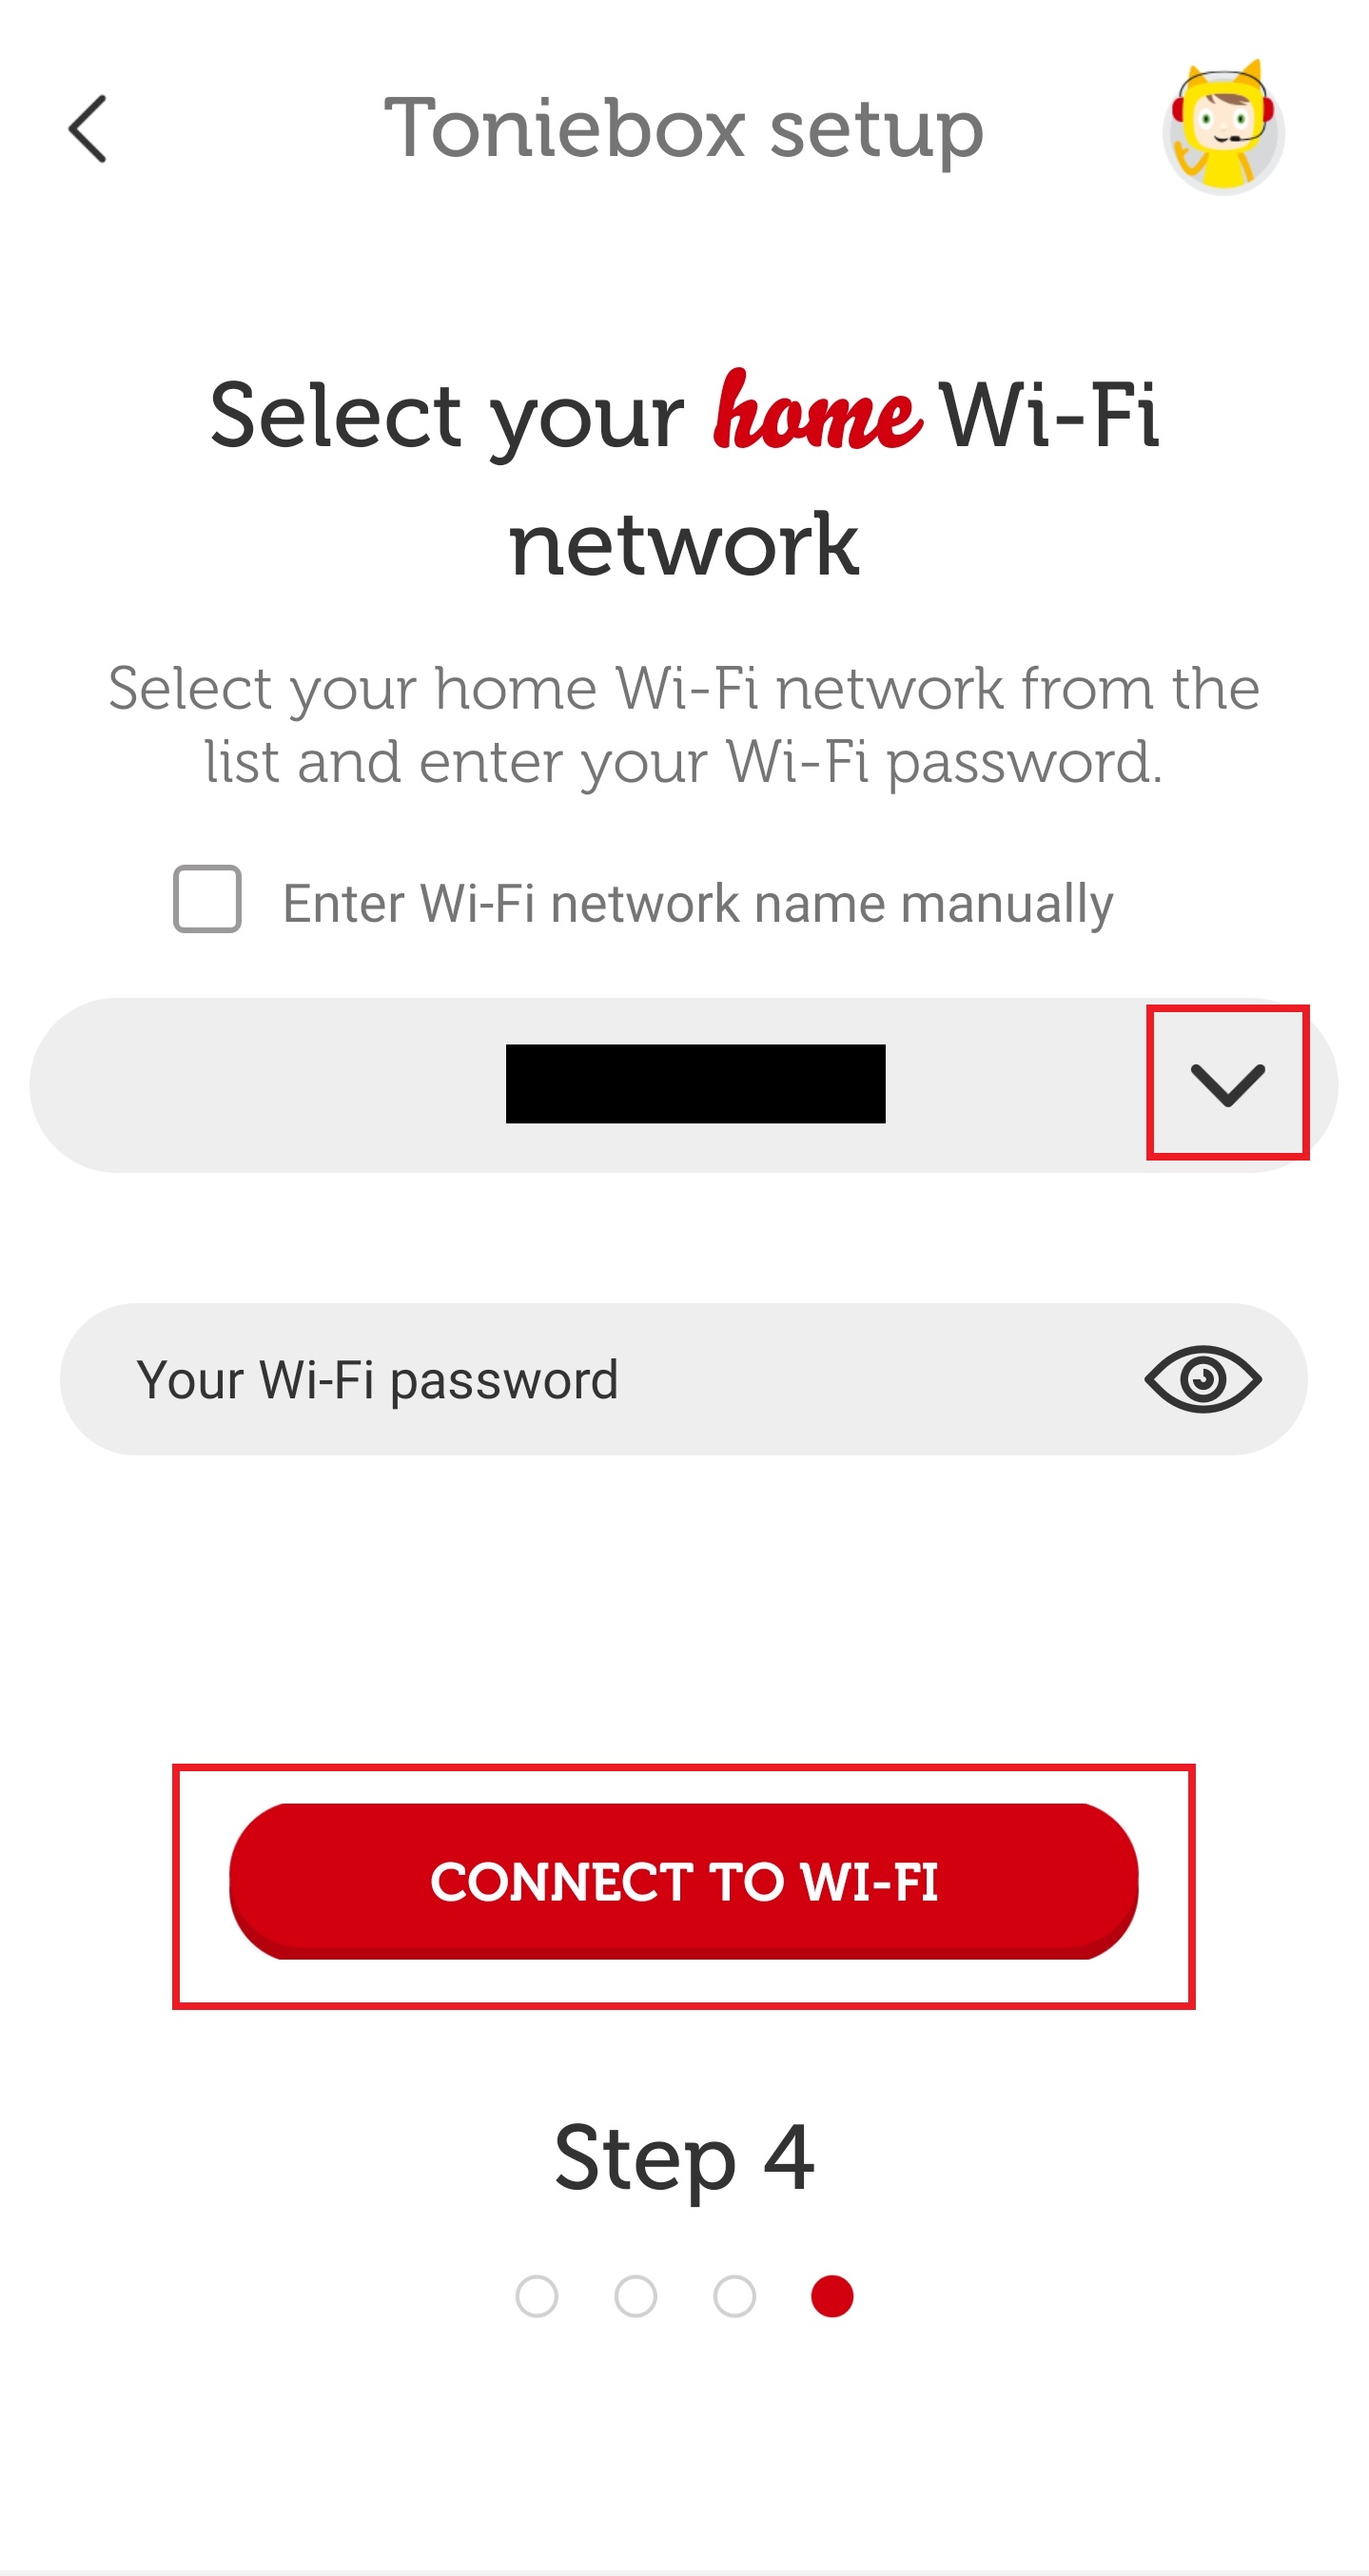
Tap the drop-down arrow to view all available WiFi connections nearby. Tap the name of your 2.4GHz WiFi and then enter your WiFi password. Tap 'Connect to Wi-Fi' after entering the correct password.
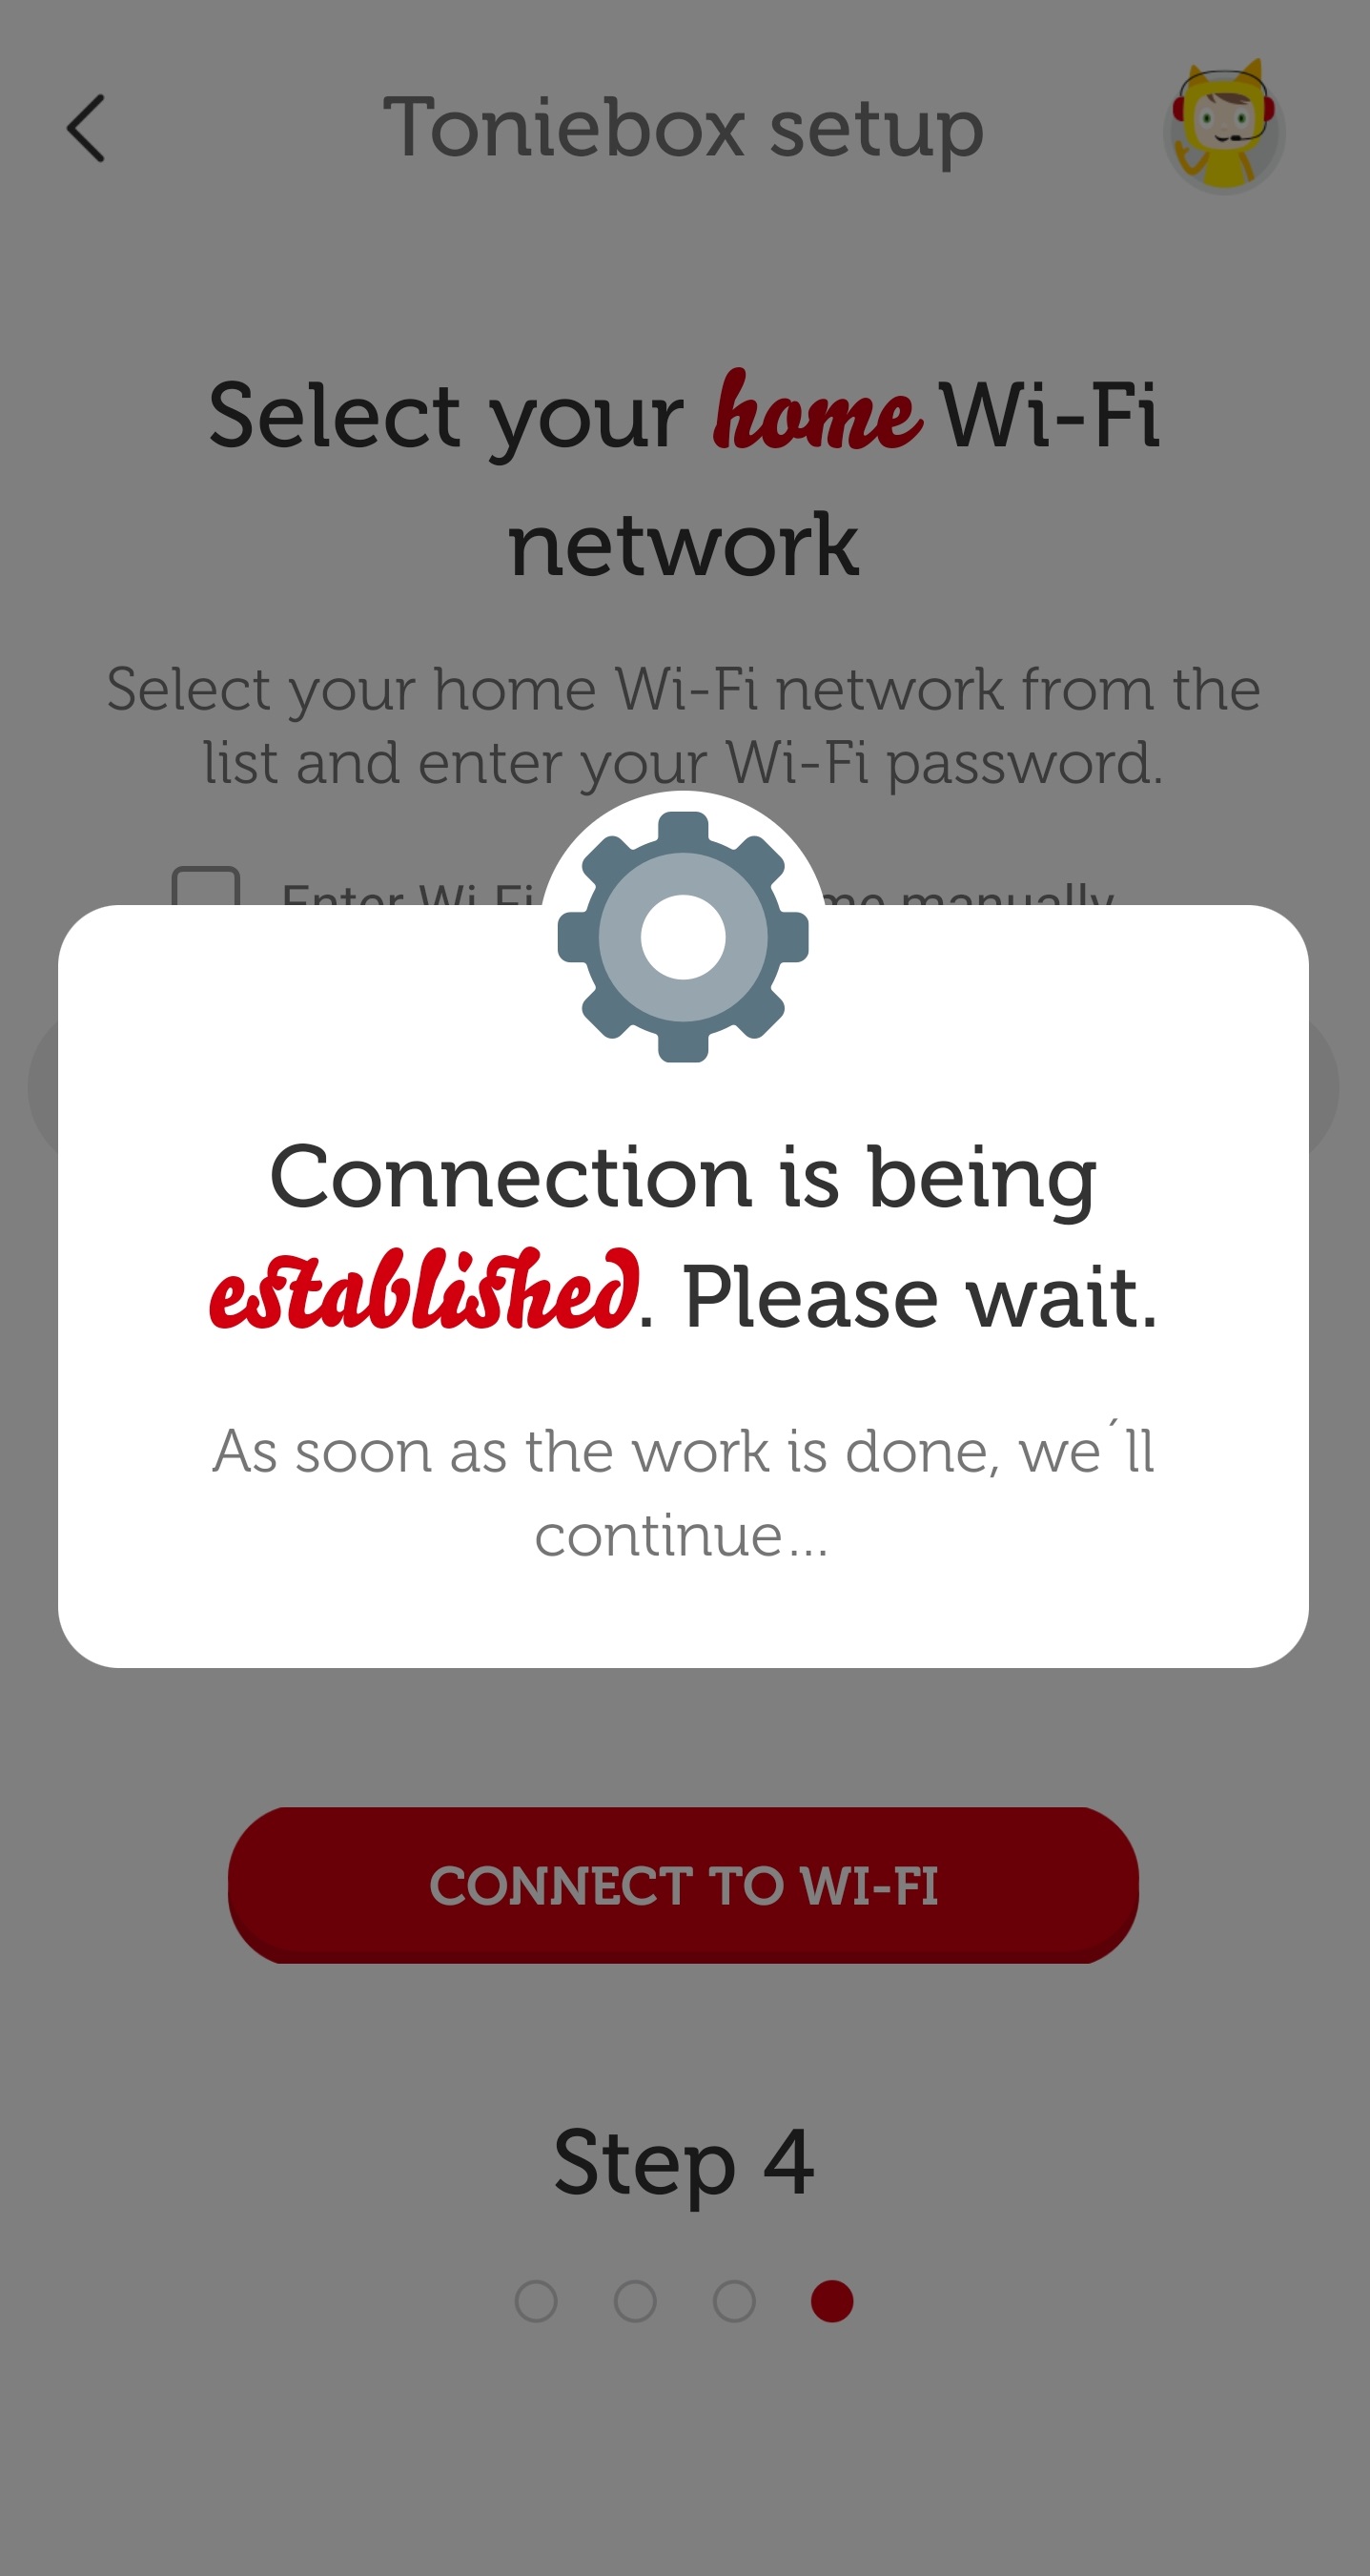
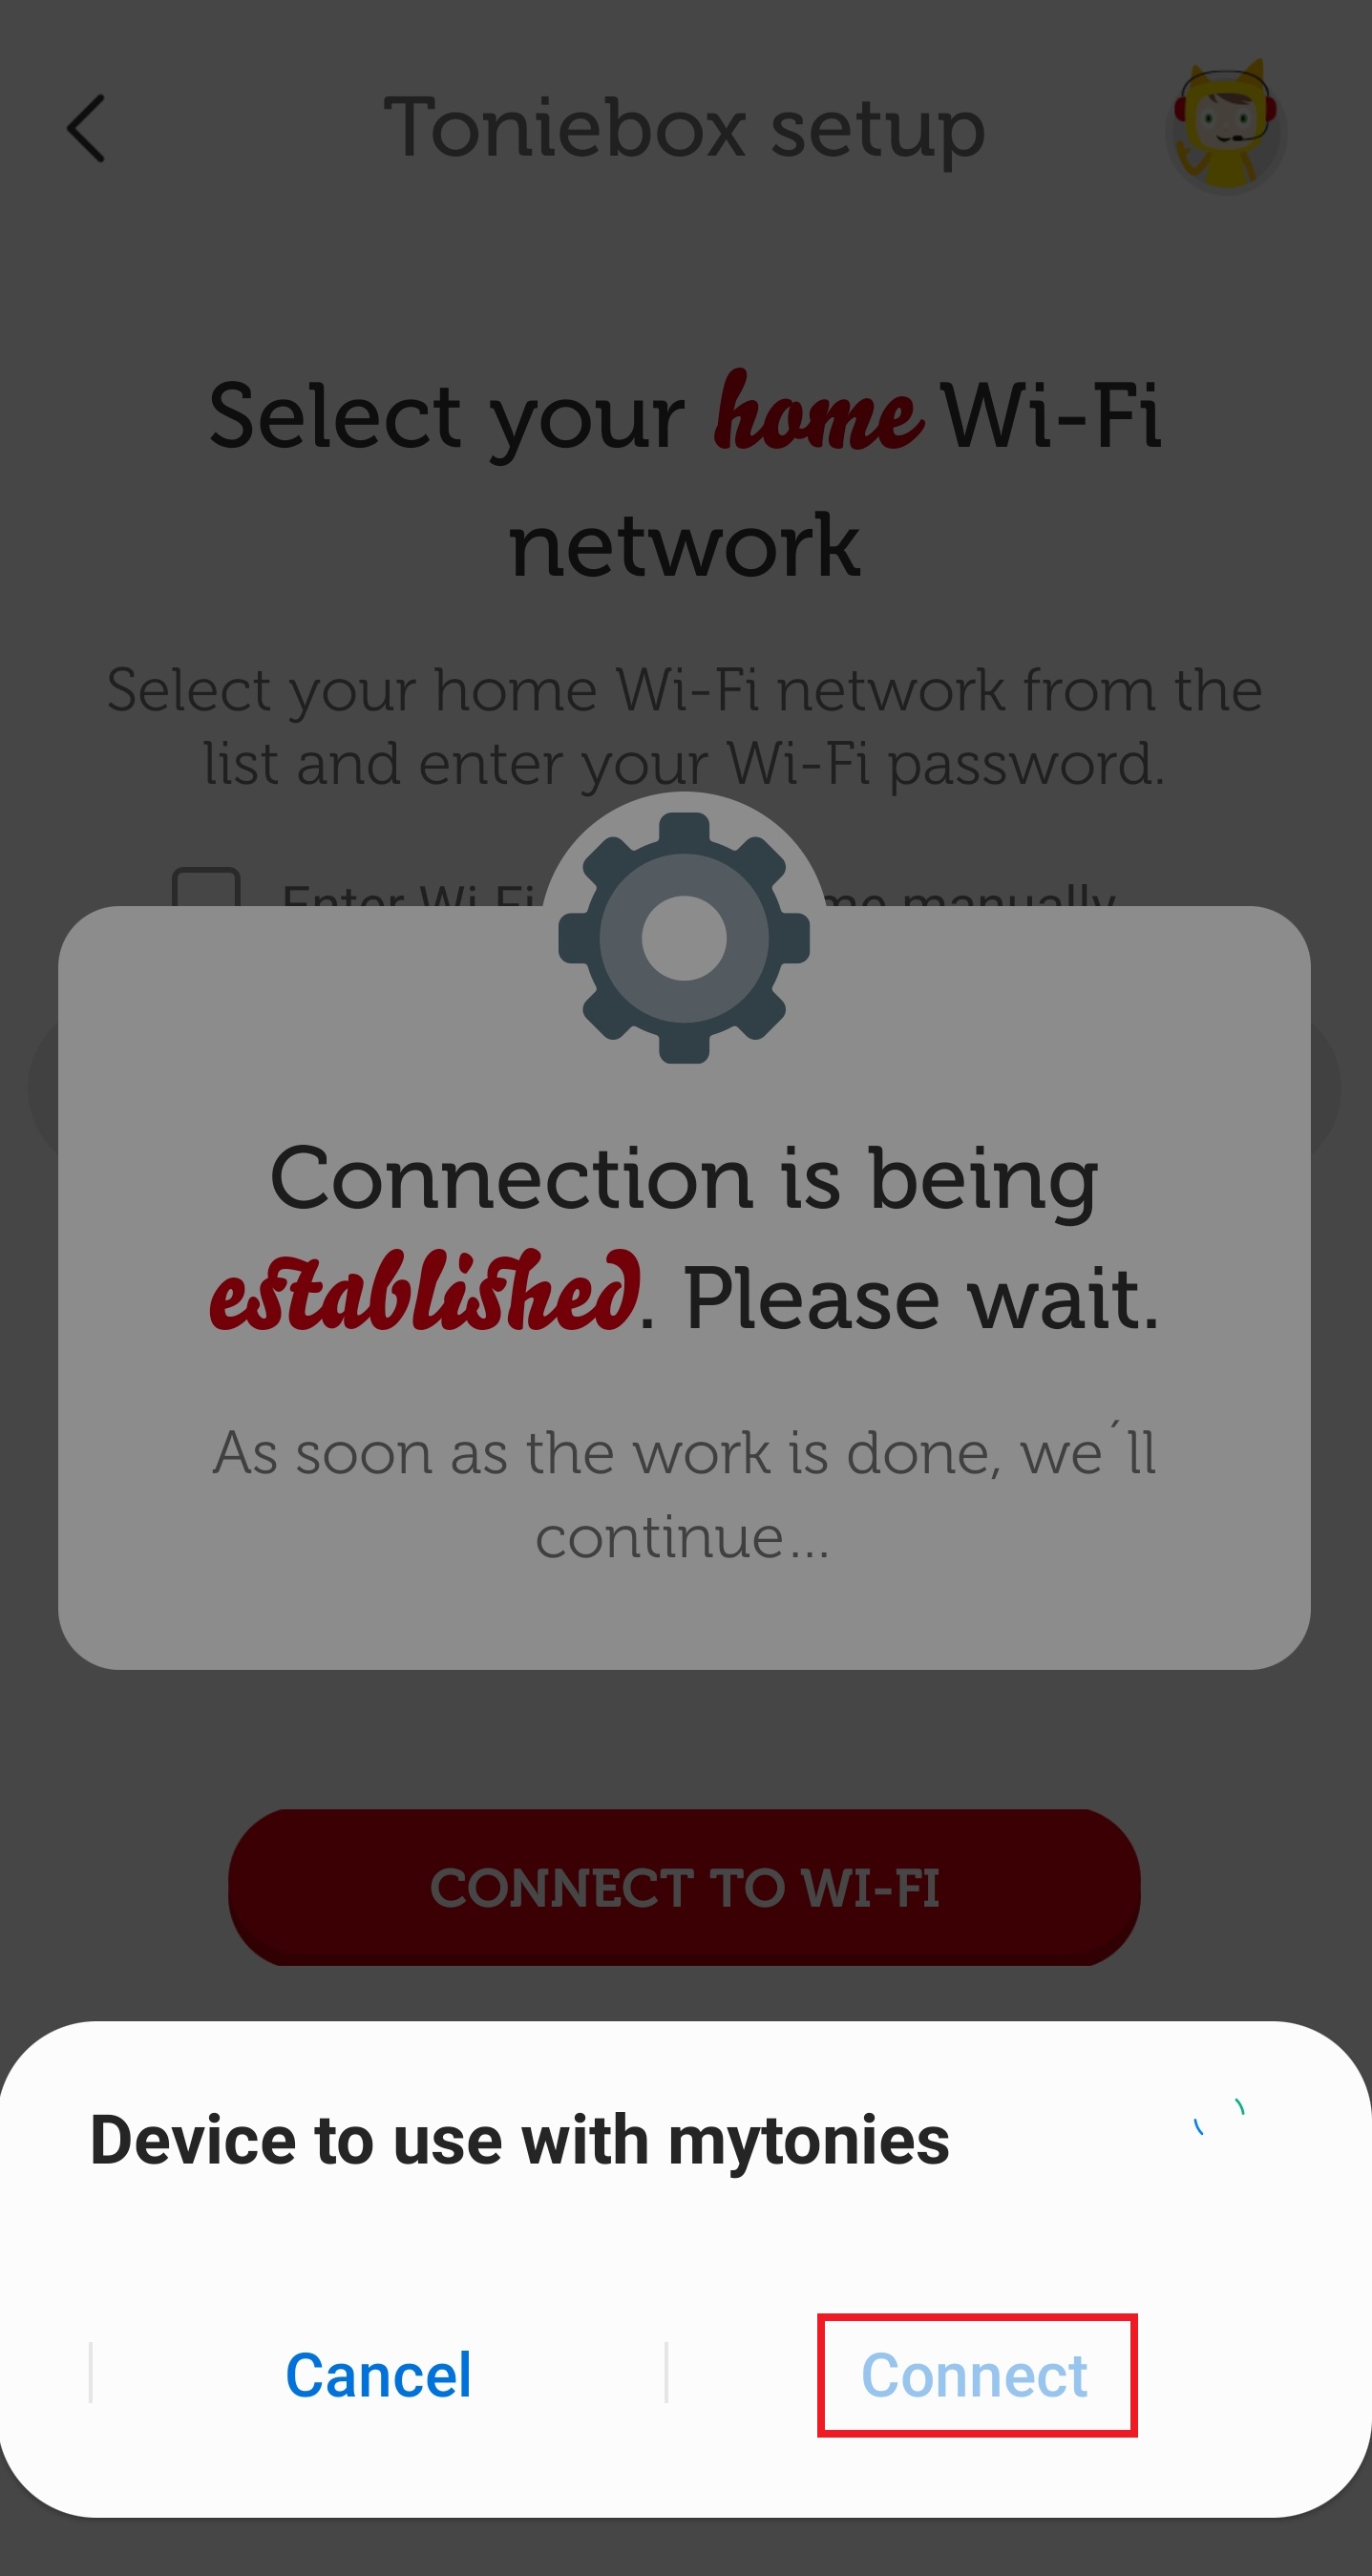
- Wait while Toniebox connects to your WiFi.
- Now your Toniebox will try to connect to your smartphone. You'll want to make sure you allow this as it's an important step to complete the WiFi connection process. You will see a different message depending on whether you are using an iPhone or Android smartphone.
iPhone Android 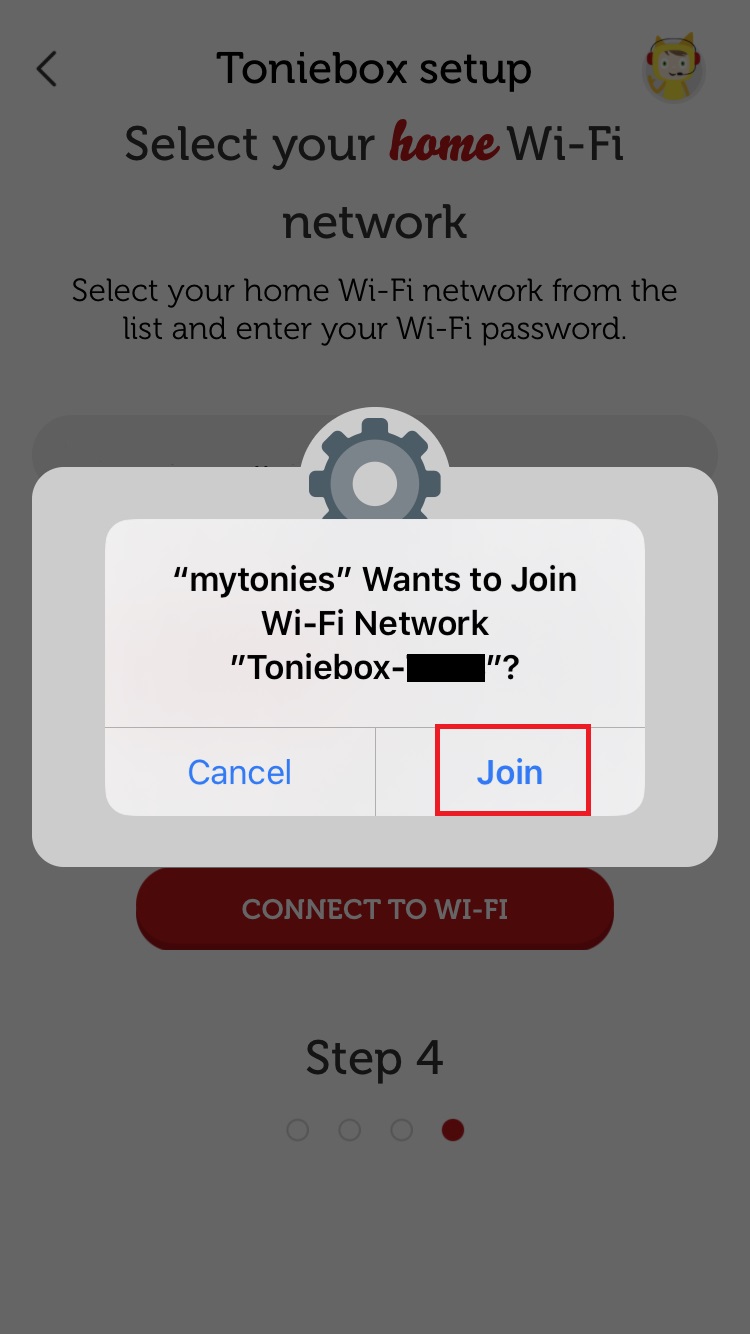
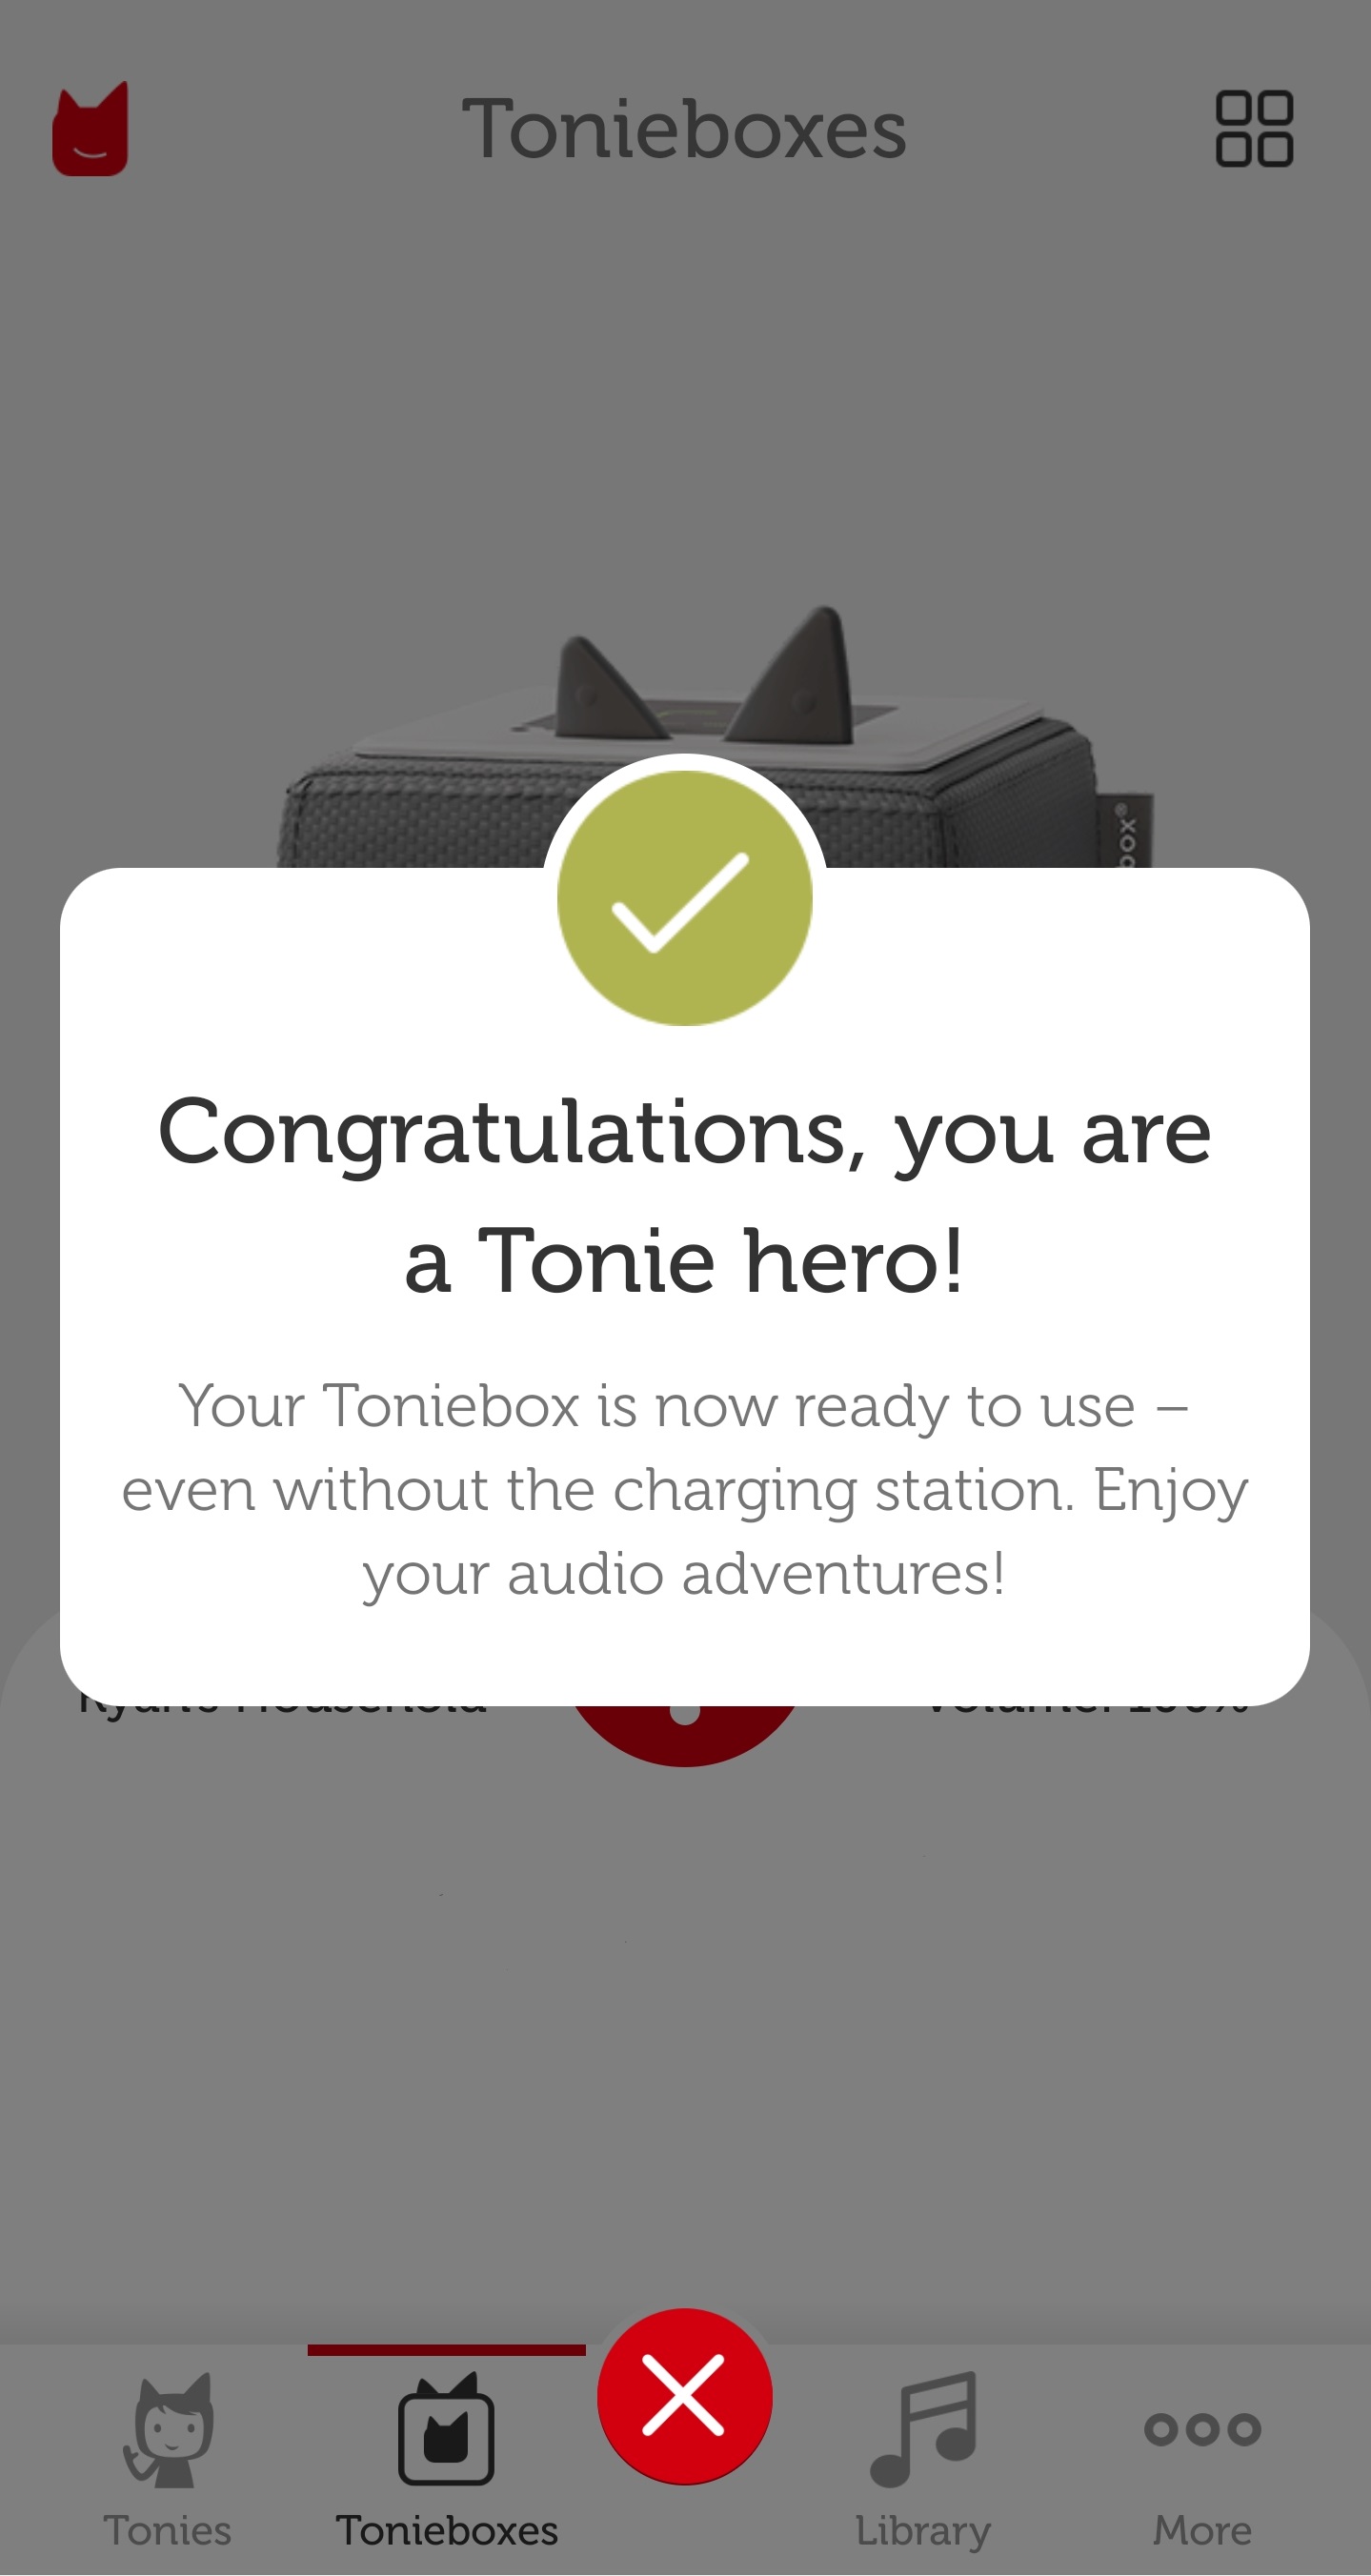
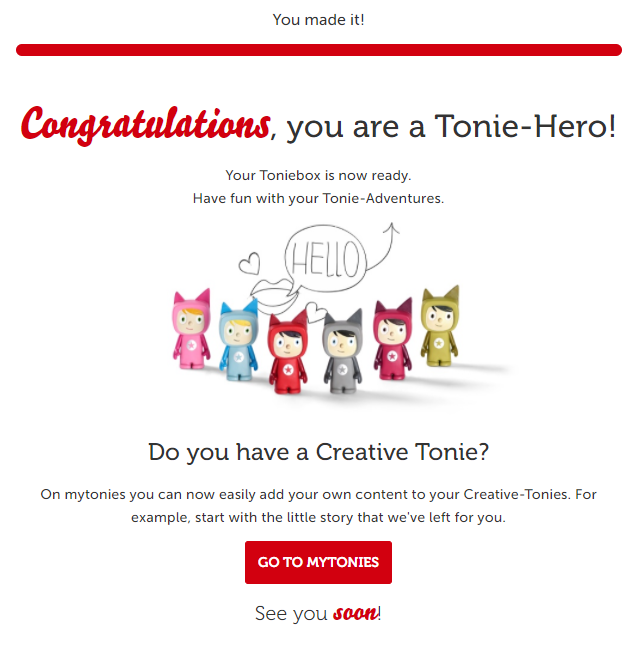
- Continue to wait while your Toniebox goes through the connection process. This may take a minute or two. Once your Toniebox has finished connecting to your WiFi and downloading the necessary updates, you will hear a welcome message and say 'Congratulations, you're a Tonie hero!' You will see the message. on your screen. The Toniebox LED should also now be solid green.
- Now your Toniebox is fully set up and ready for Tonies! Insert a Tonie into the Toniebox and it will start downloading its contents and the LED will start blinking blue. When your Tonie has finished downloading all of its content, the LED on the Toniebox will turn solid green and a buzzer will sound. Now Tonie can play without WiFi connection. If you encounter any problems during installation, send us a message , we will be there to help you!
your toniebox my.tonies.com/setup Installing via:
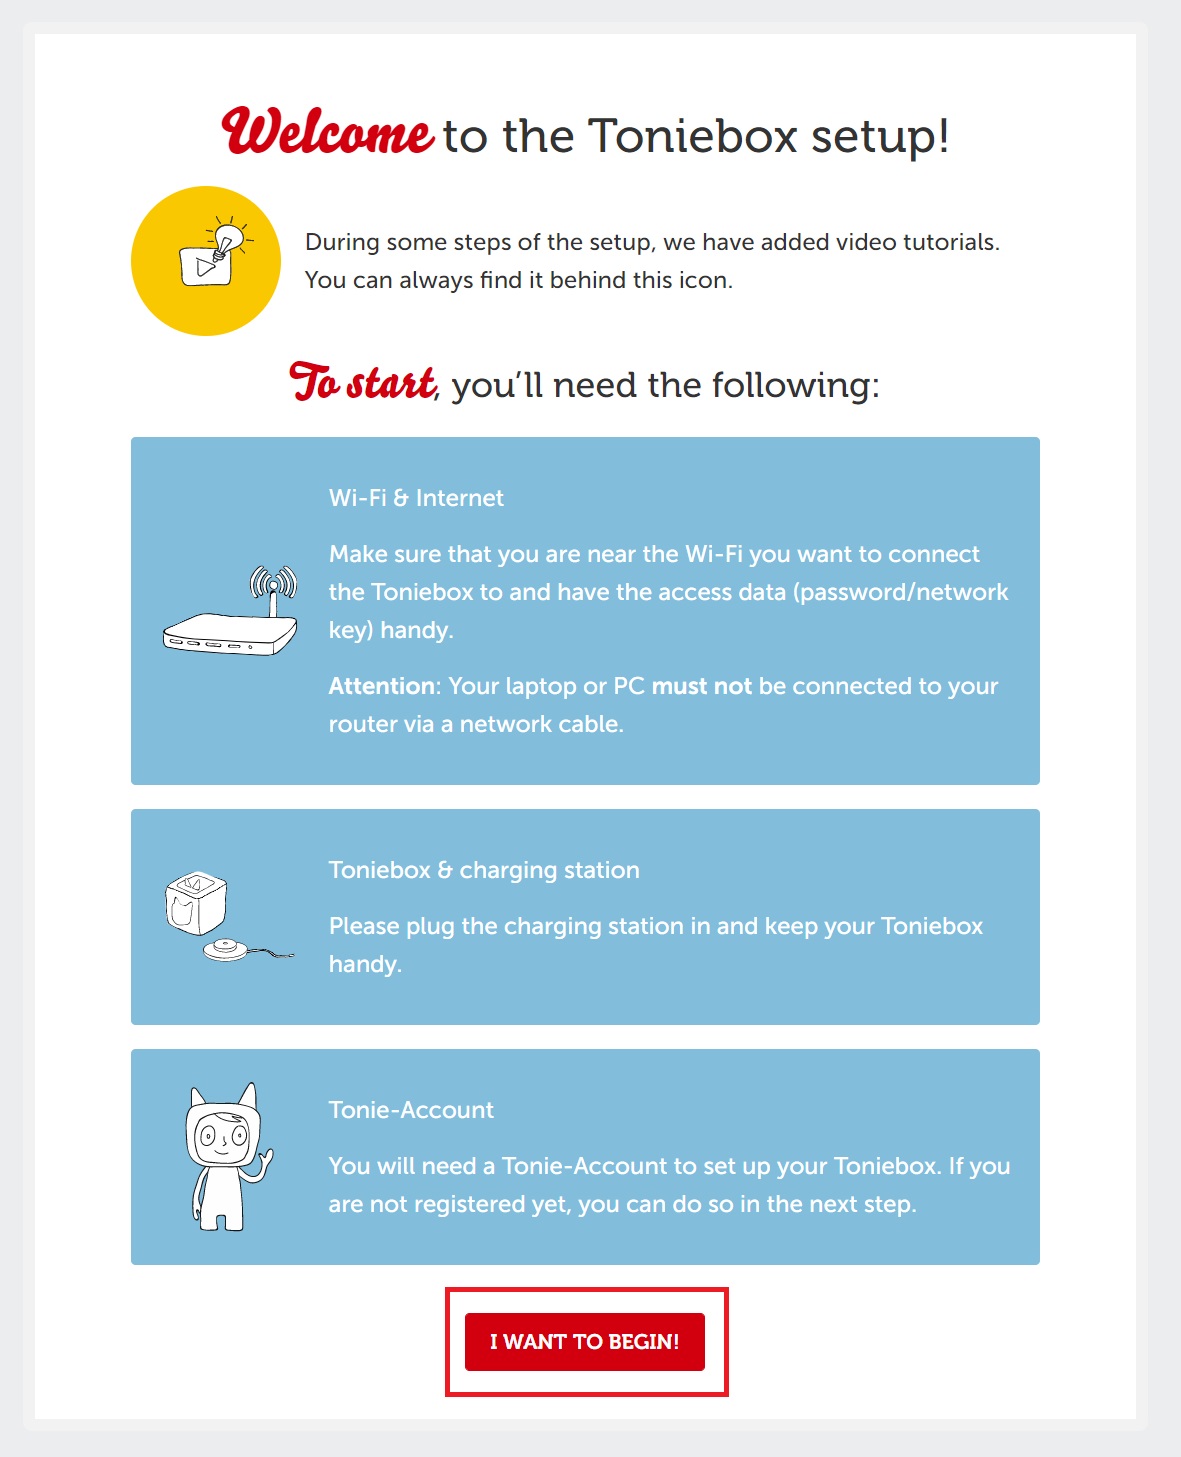
- my.tonies.com/setup on your computer Go to . If you have not yet logged in or created a free Tonie-Account, you will be presented with the page shown below. Click on 'I want to get started'.
- You can sign up for your free Tonie-Account by entering your details here and clicking the 'Sign Up Now' button. If you have already created a Tonie-Account, click 'Log In Now' and log in using your credentials.

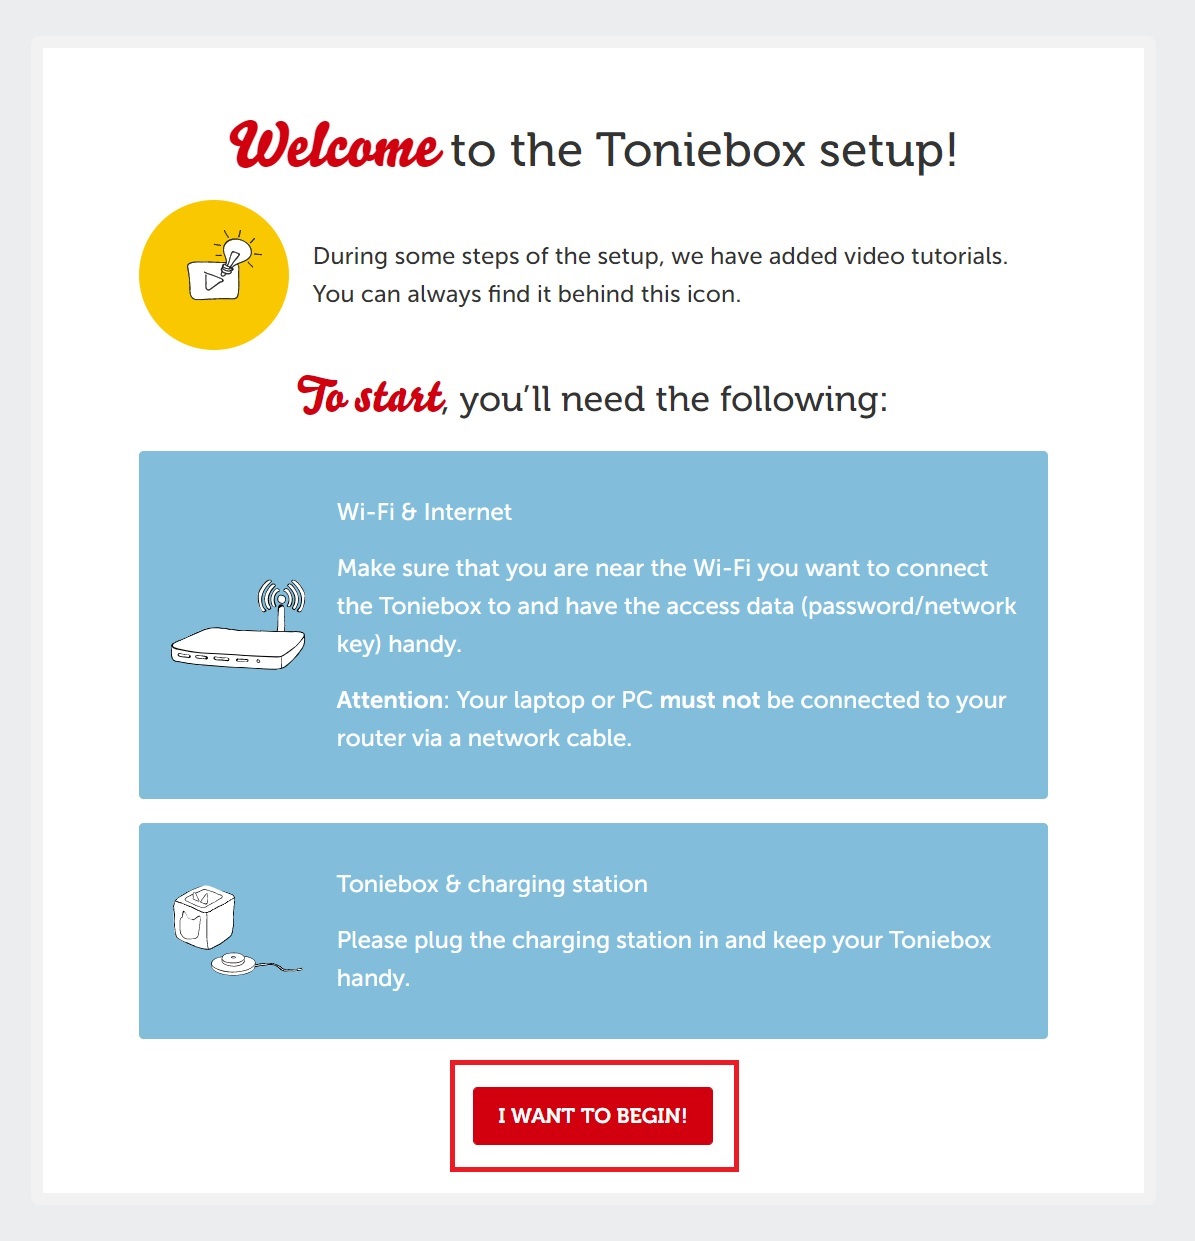
- Make sure you have access to a 2.4GHz WiFi connection, your Toniebox, and the Toniebox Charging Station. Also make sure your computer is connected via WiFi and not directly via ethernet cable. When you're ready, 'I want to get started!' Click .
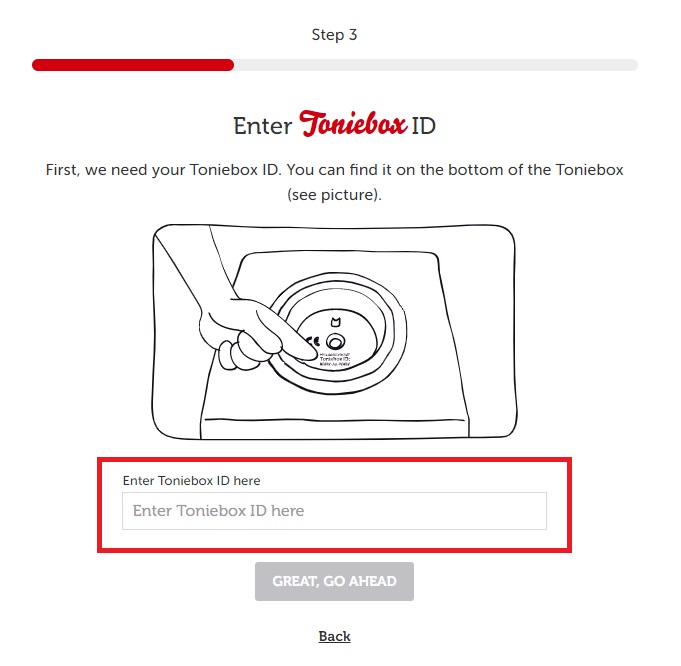
- Enter your Toniebox ID. This is the 8-digit ID that can be found on the bottom of your Toniebox. Make sure the Toniebox is not on the charger, otherwise you won't be able to see the Toniebox ID. Once you enter your Toniebox ID, click 'Great, continue'.
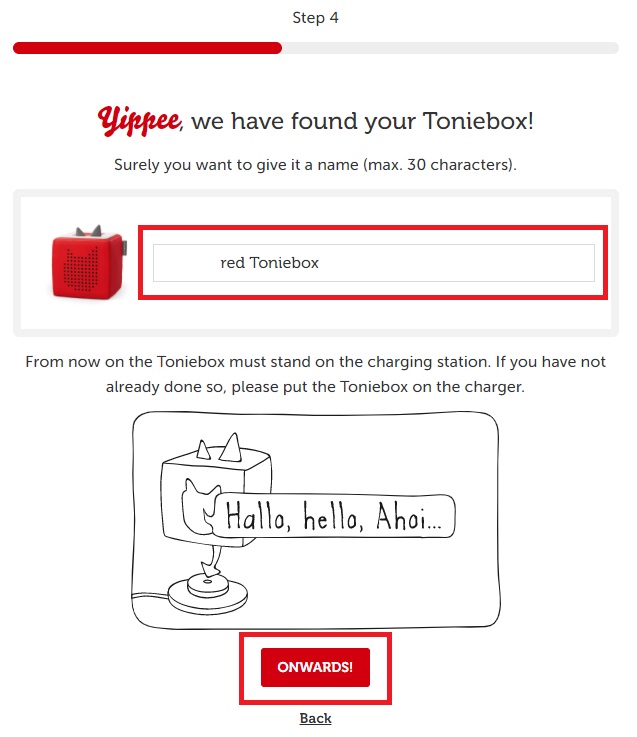
- Here you can name your Toniebox. After entering a name, 'Next!' Click on it.
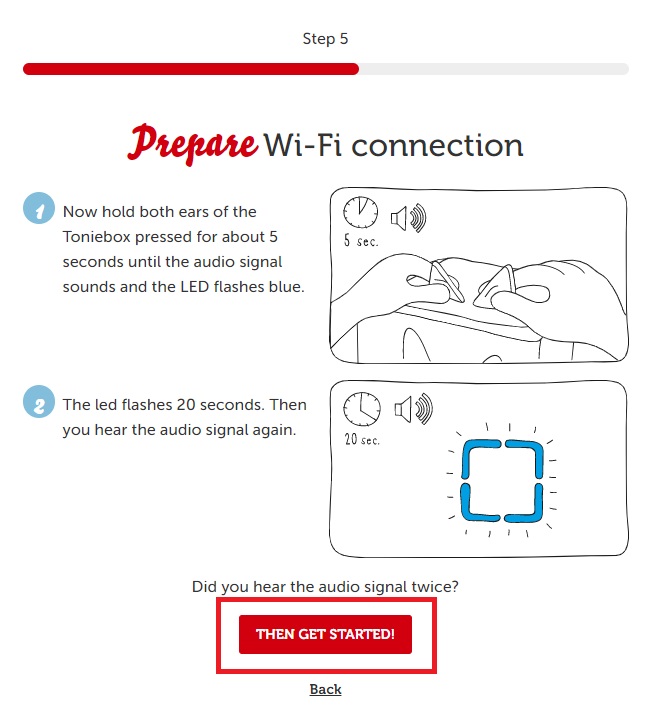
- Place the Toniebox on the charger to turn it on. Then, pinch both ears for about 5 seconds until you hear a beep and the LED starts flashing blue. Wait approximately 20 seconds until you hear a second beep. Then 'Then start!' Click .
- You will now need to connect to your Toniebox. This is done over a Toniebox WiFi network. Please note that this is different from your regular home WiFi connection, which we will connect to in a future step.

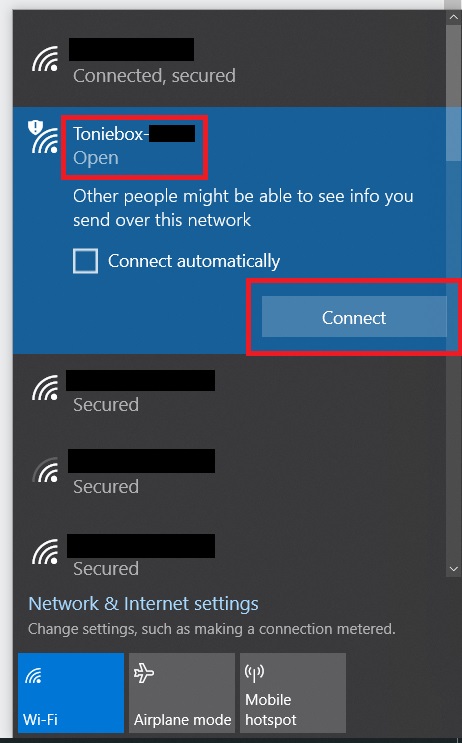
- Open your network list. To do this, click on the WiFi icon in the bottom right corner of your screen.

- Find the “Toniebox-####” network in the list of WiFi connections. The last 4 digits of the connection name will be different for each Toniebox. Click on the Toniebox network name and then click 'Connect'.
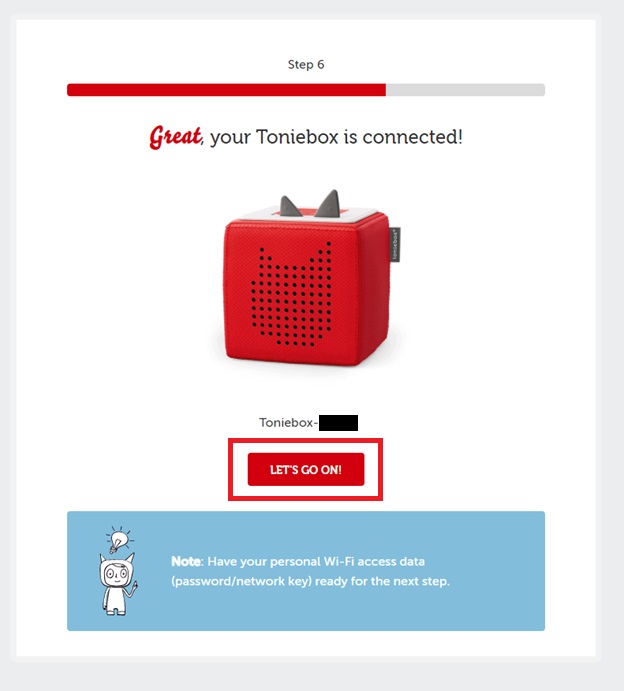
- Once connected to your Toniebox, 'Let's get started!' Click .
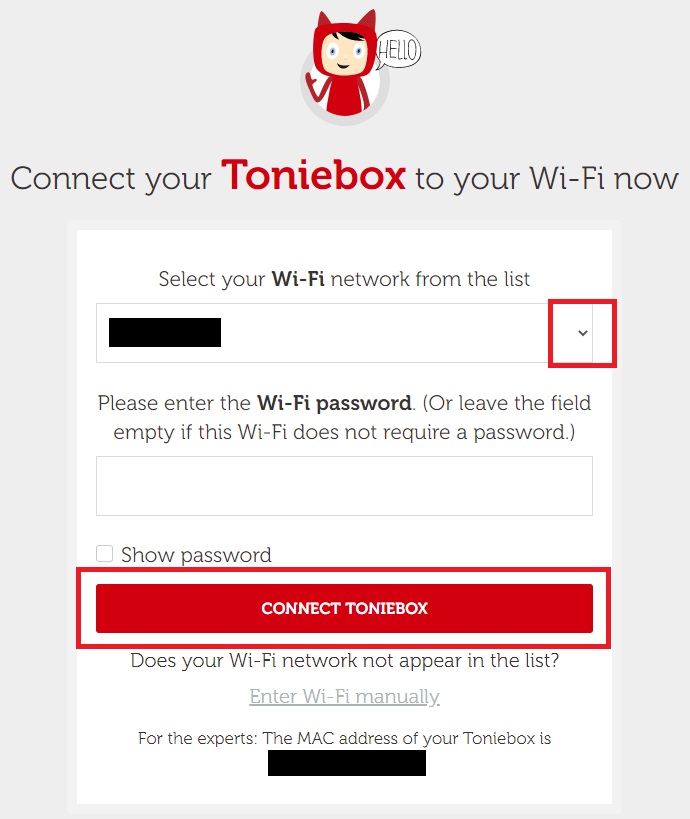
- You will now be connected to your home's 2.4GHz WiFi connection. You can click the drop-down arrow to view all available WiFi connections nearby. Click on the name of your WiFi and then enter your WiFi password. After entering the correct password, click 'Connect to Toniebox'.
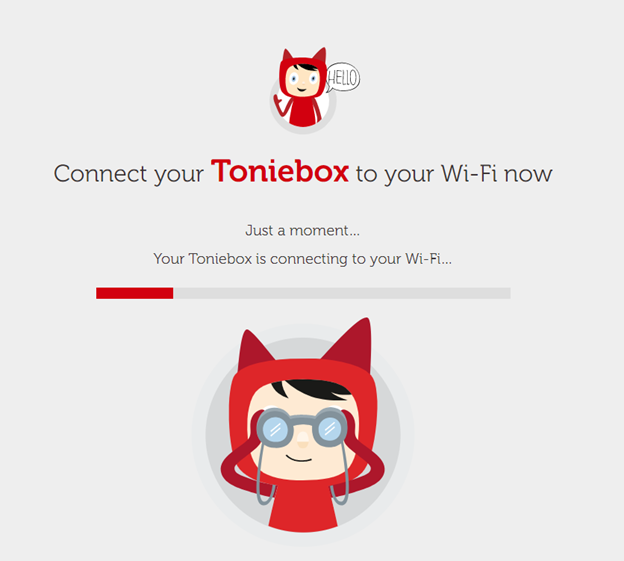
- Please wait while Toniebox connects to your WiFi.
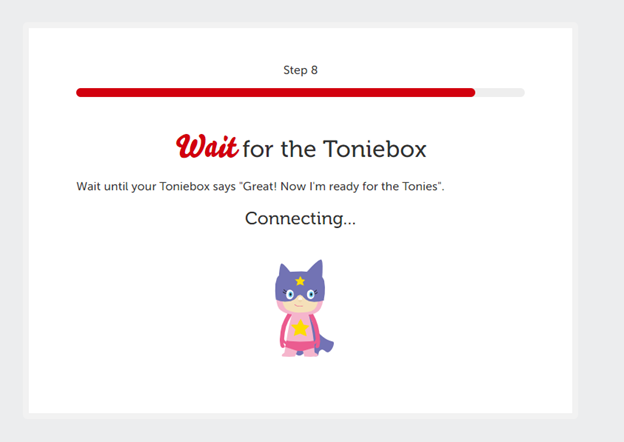
- Continue to wait while your Toniebox goes through the connection process. This may take a minute or two. You may hear a few beeps and the LED on the Toniebox will alternate between blinking blue and blinking green. No need to worry, this is normal!
- Once your Toniebox has finished connecting to your WiFi and downloading the necessary updates, you will hear a welcome message and say 'Congratulations, you are a Tonie-Hero!' You will see the message. on your screen. The Toniebox LED should also now be solid green.
- Now your Toniebox is fully set up and ready for Tonies! Insert a Tonie into the Toniebox and it will start downloading its contents and the LED will start blinking blue. When your Tonie has finished downloading all of its content, the LED on the Toniebox will turn solid green and a buzzer will sound. Now Tonie can play without a WiFi connection.
How to add content to your Creative-Tonie:
Using the Mytonies app
- Open the Mytonies app and tap the icon titled 'Collection' in the bottom right corner.
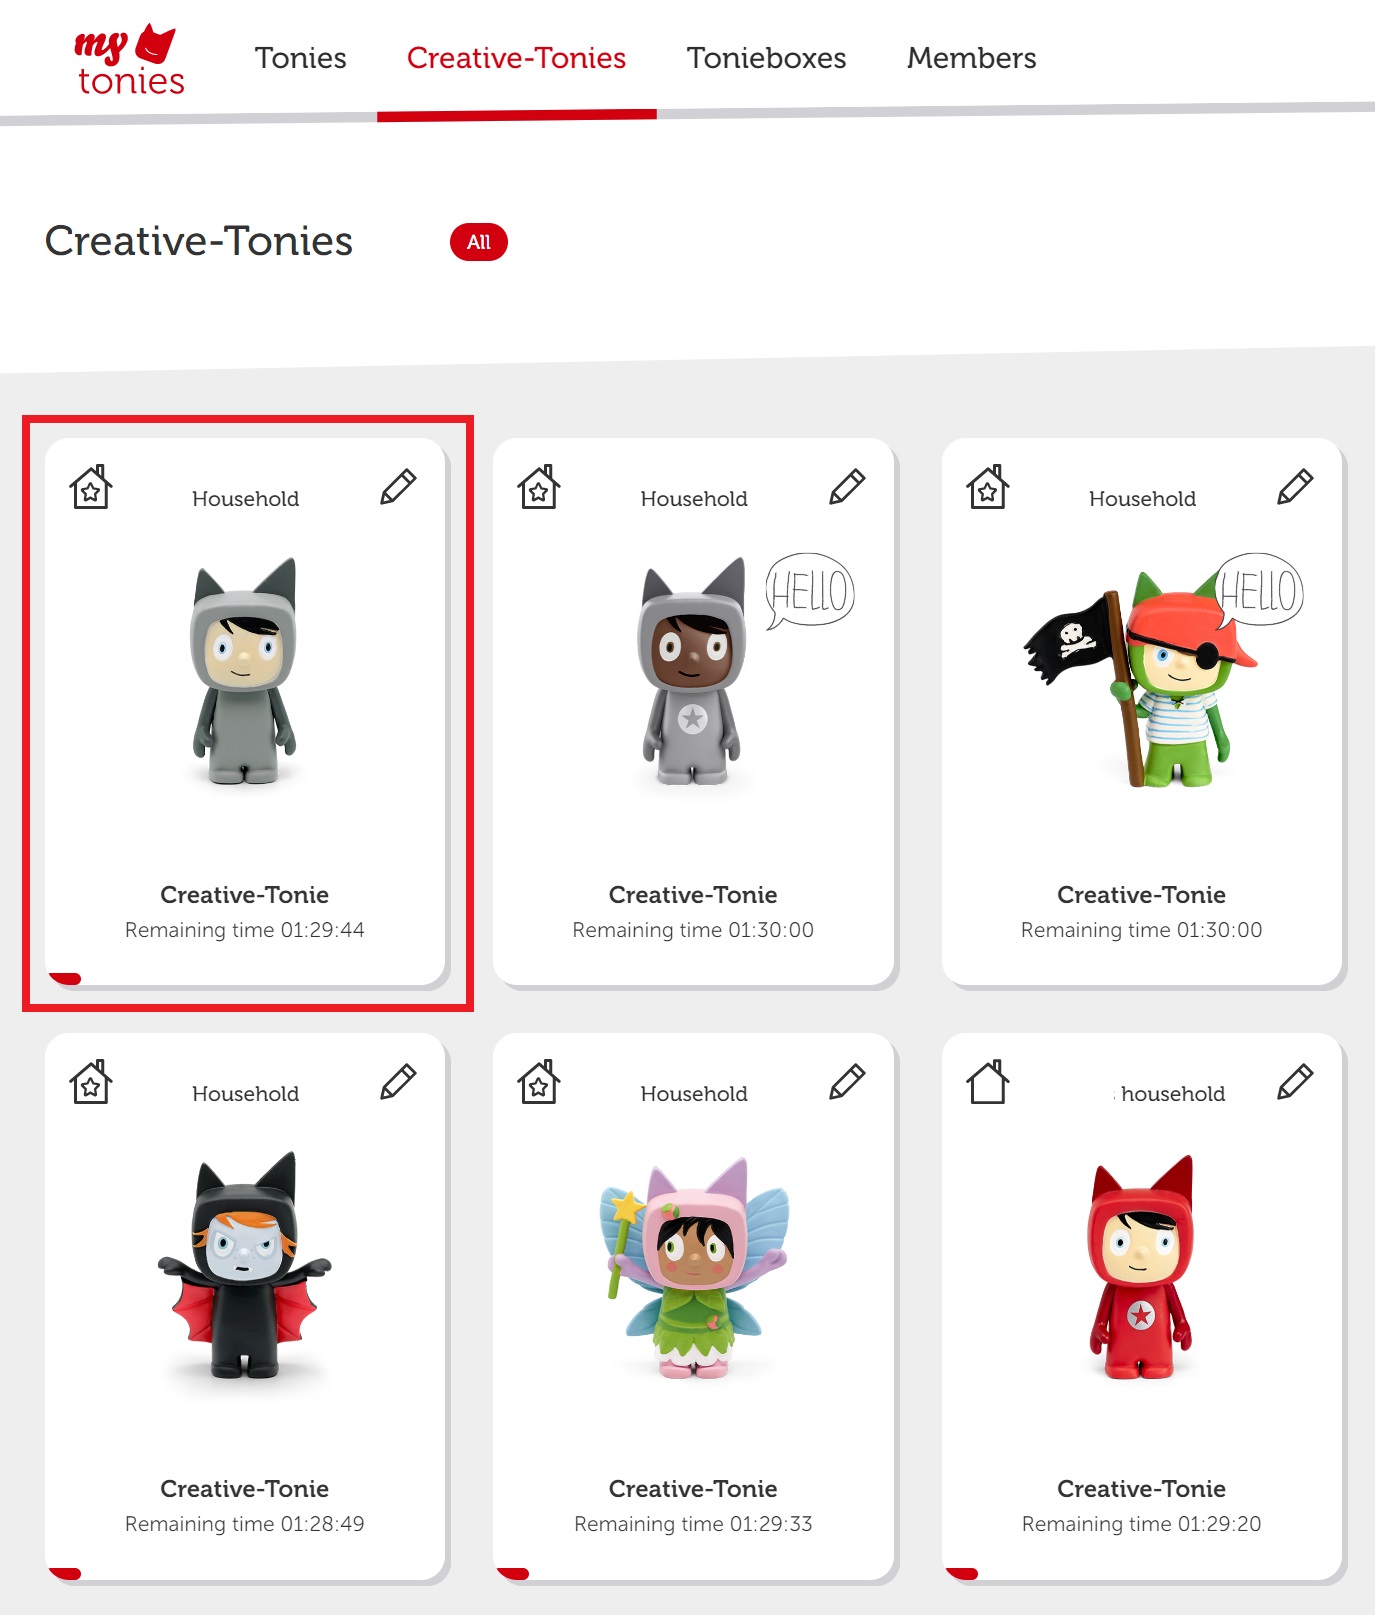
- Tap the 'Creative-Tonies' heading.
- Tap the image of the Creative-Tonie you want to add content to.
- Here you can choose whether you want to record new content directly into Creative-Tonie by tapping the microphone button, or load previously recorded content by tapping the tonie/ok icon.
- If you choose to record new content directly, tapping the microphone button will open the recording page. Tap the red circle to start recording.
- When you finish recording, tap the red stop button at the bottom of the screen.
- After the recording is stopped, you will have the opportunity to listen to the recording, delete it and record it again, or save it and assign it. Tap 'Save and assign' if you want to add the recording to Creative-Tonie.
- Once the new content is uploaded to Creative-Tonie, simply sync Toniebox to download the new content. To do this, turn on the Toniebox and pinch one of the Toniebox's ears for about three seconds until you hear a sound. The LED will start blinking blue as your Toniebox updates with new content. You can then place the Creative-Tonie into the Toniebox when the light turns solid green. The new content will then be played and downloaded simultaneously.
Using my.tonies.com
- my.tonies.com Log in to your account at and click on the 'Creative-Tonies' heading.

- Click on the Creative-Tonie to which you want to add content.
- Click the button/arrow icon on the right side of the screen.
- Here you can choose to add Free Content or upload your own files to Creative-Tonie. For this walkthrough we will choose to upload our own file.
- Here you can Drag and Drop or Browse for Files that you want to upload to your Creative-Tonie.
- When you finish selecting the files, click the 'Save Content' button to upload the new files to Creative-Tonie.
- Once the new content is uploaded to Creative-Tonie, you will need to sync Toniebox to download the new content. To do this, turn on the Toniebox and pinch one of the Toniebox's ears for about three seconds until you hear a sound. The LED will start blinking blue as your Toniebox updates with new content. You can then place the Creative-Tonie into the Toniebox when the light turns solid green. The new content will then be played and downloaded simultaneously.
- If you encounter any problems during installation, send us a message , we will be there to help you!
